A stand-up pouch brief should describe what the filled pack must do: accept the product, close through the intended process, present its front, open usefully and fit the delivery arrangement. Begin with these tasks before choosing visual styling. The output is a requirements sheet that a designer, converter and packing team can review together.
Put the product and process at the top
Identify the actual product form, declared quantity and normal variation. State whether the requirement is for premade pouches or film for an established machine route. Give the filling team's contact role and the available line specification. Avoid presenting an attractive reference pack as evidence that the same construction suits your product.
Separate confirmed requirements from preferences. A retailer's clear height limit is a requirement; a preference for a tall silhouette is a design direction. This distinction helps the supplier propose a workable sample when the two conflict. Include a representative product sample or a clear plan for obtaining one.
Turn preferences into observable requirements
A useful brief separates a hard boundary from the way the team hopes to meet it. For example, “must fit the confirmed shelf opening” names a boundary. “Use a taller front” proposes one solution. Give the supplier the boundary and explain the preference, so another credible construction can be considered.
Add a reason beside each requirement. A large mouth may be needed for a particular scoop, the filler interface or whole-piece access. Those reasons can lead to different geometries. If the mouth is narrowed later, reviewers can identify the affected task immediately instead of repeating every project discussion.
For an illustrative snack project, the sales team wants a compact front while packing needs access for bulky pieces. The brief records both requirements and requests two clearly identified candidates. Both receive the same representative quantity. Reviewers compare normal filling, clear closing space and front visibility, then explain the chosen trade-off. No supplier capacity or production result is implied by this example.
Use separate columns for confirmed input, proposed response and evidence needed. Keep the evidence column practical: a drawing, a physical fit observation, a complete-pack report or a named owner's decision. This makes the first review a decision about specific gaps rather than a vote on the most attractive mock-up.
Describe the base task without prescribing a cure
State whether the pouch must stand unsupported, within a display tray or with other units. Record the intended fill range and the display surface. Layfield's guide illustrates a supporting base-gusset construction. Its diagram explains a format feature; your filled sample must establish the actual stance.
If an earlier sample leans, describe when and how. “Base remains partly folded after normal filling” is more useful than demanding a larger gusset without evidence. Ask the converter and filling team to propose a change that can be compared with the original sample.
Explain why the filled base matters
OpenStax's stability explanation connects stable support to centre of gravity and the supporting base. This is basic statics, not a flexible-pouch experiment. In a pouch brief, it explains why the actual filled shape deserves observation rather than a prediction from the empty front view.
The product can collect unevenly, a fold can remain tucked and the supporting footprint can differ from the drawing's apparent width. Record those conditions separately. A reviewer who reports “leans towards the front after ordinary placement” provides a useful event; a reviewer who writes “increase stiffness” has already chosen a cause and remedy without showing the evidence.
Include the display surface and surrounding support. A pack approved within a close-fitting tray has been assessed for that arrangement. If commercial plans later change to individual unsupported display, revisit the standing task. The physical component may be unchanged while the requirement has changed substantially.
For a range using one pouch at several quantities, choose representative intended fills and label them. Let the observation reveal whether a common component is credible. Keep a dedicated smaller component, a support tray and a revised quantity as separate alternatives, with their own commercial consequences.

Assign each panel a communication job
Use the front for immediate identification and the intended variant hierarchy. Put supporting information on a panel that remains accessible after filling. Reserve a defined area for variable coding. Ask the artwork owner to confirm required content with the responsible regulatory or customer reviewer.
Map folds and seals before arranging small text. A flat layout can place information where it becomes curved, tucked or visually interrupted. Do not reduce text solely to accommodate an unapproved shape. First establish which panel areas remain usable on the filled prototype and then develop the final layout on the supplier's drawing.
Use a task-based brief
| Task | Brief entry | Evidence required |
|---|---|---|
| Fill | Product form, quantity and route | Representative filling observation |
| Close | Final closing and optional reclosure arrangement | Complete closure sample |
| Display | Support, orientation and clearances | Filled shelf review |
| Identify | Front and back panel jobs | Proof on approved geometry |
| Use | Opening and access expectations | Observed customer-use task |
| Deliver | Carton pattern and destination | Physical outer-pack review |
This original brief makes a missing decision visible. Mark “supplier proposal requested” where the construction is open; do not insert a guessed film structure or machine limit merely to fill a field.
Connect panel jobs to the packing sequence
Panel planning should include the order in which information is used. Warehouse staff identify the SKU before filling. The line applies variable information after or during packing. The customer recognises the product on shelf and reads instructions during use. Those moments require different views of the pack.
Ask the packing owner to mark contact and coding areas on the drawing. A plain area may look suitable for a code while being folded, curved or held by the equipment. A development sample can help locate an accessible region, followed by review through the actual proposed coding route.
Create a brief example for each important panel. “Front: product and variant visible above the actual tray lip” is clearer than “strong branding.” “Back: approved directions readable without pulling the base open” provides a specific check. The designer can still choose typography and visual style within those boundaries.
When language variants are involved, collect approved copy before approving the space allocation. Text length can differ, so a layout that works for one language may need another arrangement. Preserve product identity, reading order and feature clearance in the review. Do not treat smaller text as the automatic answer to an unresolved panel-size conflict.
Keep format evidence separate from product approval
GS1's package measurement standard provides trade-item measurement conditions. Use those when appropriate for customer data, while the supplier drawing controls the empty component. Keep both linked to the filled sample rather than letting one dimensional record stand in for every approval.
Ask what evidence supports the proposed material for your actual product and storage conditions. Standing ability, print quality and barrier performance are separate questions. A successful shelf photograph does not establish shelf life or product compatibility, and an impressive film name does not prove that the proposed pack fills cleanly.
Use evidence in the order it becomes useful
Start with the least expensive evidence that can answer the current question. A labelled unprinted sample may resolve basic fit. It cannot establish final colour. A flat print proof may settle copy and layout while leaving the filled front's appearance open. Describe those limits once in the sample record.
For each requested sample, name the decision it supports and the next dependency. If a candidate fails mouth access, correct that before investing effort in detailed artwork on the same geometry. If fit is acceptable but a material question remains, preserve the fit decision and commission the relevant technical evidence.
Keep a short discrepancy list through development. Record the requirement, the observed difference, the proposed action and the owner. Close an item by linking the revised drawing or accepted evidence. “Discussed on call” records contact but does not tell another team what was accepted.
The resulting brief should be usable by someone who missed the meetings. They should identify the intended product, component, open decisions and next authorised activity from the file. That is the practical test of a procurement brief: it reduces conflicting assumptions before those assumptions enter artwork, trial planning and the purchase order.
Stand-up pouch layout: a practical specification example
A pack is shortlisted for its shape, then its panels are divided between artwork and functional features. Work from the filled geometry: a bottom gusset, side gusset and flat base are distinct constructions. Establish where the product will settle, which panel the customer sees and which edge is used for filling. This prevents an artwork decision from silently changing the pack layout.
For this decision, start with the standing base and intended fill level. The useful output is the front face reviewed on a filled pouch. Put that output beside the relevant quotation, drawing or sample rather than leaving it in a separate email. This is an illustrative decision exercise, not a report of a completed customer trial.
Product references to make the discussion concrete
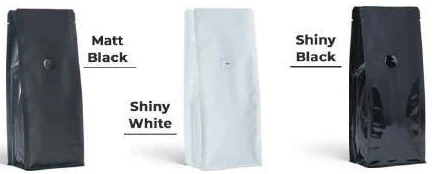
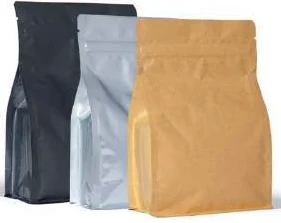
The catalogue includes flat-bottom pouches and side-gusset pouches. These examples show different physical constructions; they are not interchangeable specifications. A box-style base gives the filled pack a distinct footprint, with separate front, back and side panels. Compare a plain top opening with a regular zipper, and use filled samples to decide the shelf depth and panel proportions.
| Format reference | Material or construction to clarify | Details to include in the brief |
|---|---|---|
| Flat-bottom pouches | Flexible laminate with paper-look or opaque outer options; the appearance alone does not identify the full layer structure. | Base width and full opened depth; net fill and product bulk. |
| Side-gusset pouches | Paper-look and opaque or foil-look laminates are illustrated; confirm the actual inner and outer layers for the contents. | Face width and side-gusset convention; filled height and headspace. |
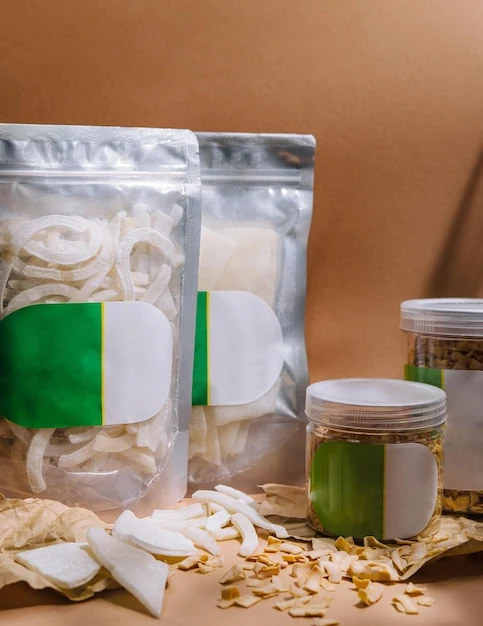
Use the reference pictures to identify the base, side panels, window or opening that you mean. A picture cannot supply the missing dimensions or material layers. If a photograph shows a finish or closure you do not want, state that difference explicitly; otherwise a visual reference can introduce an unintended requirement.
Complete the record before requesting the next sample
- Attach the front face reviewed on a filled pouch. Identify the product or SKU and the date of the observation.
- Record the standing base and intended fill level. Keep confirmed information separate from proposed values and questions for the supplier.
- Add the actual fill weight or volume, the dimension convention, material proposal and intended closure. Include the number of designs and quantity per design when requesting a quotation.
- State which question the next drawing, sample or quotation must resolve. A change of size, closure or material should remain visible alongside the earlier reference.
This record makes the next conversation specific. It lets the design, purchasing and packing teams work from the same proposed item and shows which decision still needs evidence. Review the related product pages for format details, or prepare a custom packaging brief with the unresolved requirements.
End with an actionable sample request
Request samples that resolve the open tasks, with deviations from the proposed production version identified. Set the review responsibilities before samples arrive. A buyer who knows who will assess filling, presentation and use can avoid repeated rounds of approval based on incomplete feedback.
Send Navkar Poly Print the task-based brief, reference dimensions, product information and destination. Ask for a dimensioned proposal and a clear sample route. The useful next milestone is a complete, identified pack that can be reviewed against the sheet, with any unresolved technical evidence recorded separately.
Sources and scope.
These references support the technical discussion. Product photographs illustrate formats; the material, dimensions and suitability of the proposed pack are confirmed for each project.
- Layfield: packaging design guide
Illustrates stand-up pouch base-gusset architecture; not evidence for any food application here.
- GS1 Package and Product Measurement Standard
Distinguishes measurement treatment for different filled flexible-pack types; does not set converter tolerances.
- OpenStax College Physics: stability
Textbook relationship between centre of gravity and support base; no pouch-specific stability result or load rating.
Let’s discuss your product.
Share your contents, dimensions, filling method, quantity and delivery destination. We’ll work through the proposed packaging specification with you.
Create a packaging brief