
Plan the back of a centre-seal gusset pouch around the real seam before placing dense information. Identify where the seam sits, how its flap behaves and which content remains visible after filling. A back panel that looks continuous on screen may be divided or partly covered on the finished pack.
Identify the seam construction on the sample
Ask the supplier to show the longitudinal seal, its intended position and any flap orientation. Confirm the open filling edge and the side folds. Record the supplier's terminology so a “centre seal gusset” request refers to the same physical pack in the quotation and artwork files.
Use measurement guides for reference definitions rather than construction assumptions. Quantum Packaging separates face dimensions and side gusset. Your project drawing should add the seam detail that matters for this particular back-panel layout.
Build a back-seam envelope on the drawing
Describe the region occupied by the actual seam and any flap in its normal resting state. The useful envelope includes the feature itself and the area whose visibility changes when it moves. Ask the converter to mark that region on the proposed drawing rather than inferring it from a flattened old sample.
Create left, seam and right references in the artwork review file. Keep the names consistent in comments. “Move this to the other side” can be interpreted in several ways when designers view different orientations. “Move the complete instruction block to the right reliable region” states a physical action.
Inspect how the back looks after normal filling and closing. Do not hold the seam flat throughout the review unless that reflects the intended customer task. Record whether a flap lies consistently or changes position. If that variation matters to important text, the layout should allow for it through a supplier-reviewed region.
In an illustrative trial, the empty sample shows all back copy, but the filled seam covers the middle of one sentence. The correction is to regroup that complete instruction. A smaller font may still leave the sentence interrupted. Diagnose the physical obstruction before applying a purely graphic remedy.
Divide information by reading task
Keep a complete thought within one reliably visible area where practical. An instruction that begins on one side of the seam and ends under a flap creates avoidable reading effort. Group related product information, storage instructions and contact details according to the content owner's approved copy.
Do not assume the seam can be flattened permanently for retail viewing. Ask how the finished pouch will normally rest and be handled. If a panel is meant to be readable only after turning the pack, check that exact action with a filled sample. The layout should work without a reviewer holding the film unnaturally flat.
Keep identification out of uncertain seam behaviour
GS1's barcode guidance identifies folds and flaps as placement considerations. Apply that guidance to the actual back-seam construction through the relevant packaging and printing reviewers. It does not supply an automatic safe distance from every seam.
Mark the fixed identifier and variable-code regions separately. Confirm which is printed during conversion and which is added during filling. A code that is accessible on the flat artwork may be less accessible after a seam is formed or when a line grips the pack.
Ask the packing team to identify the moment when each code must be applied and inspected. Then check the region in that state. The customer may read the back after purchase, while an inspection system sees it at a defined line position. One convenient photograph does not represent both views.
Retain an agreed region in the construction file and a visible boundary in the artwork file. If the seam orientation changes, compare both references before a repeat order. The purpose is preventing a seemingly local seam change from making product identification or production coding uncertain.

Make a seam-aware content map
| Back-panel region | Planned content | Physical question |
|---|---|---|
| Left reliable area | One complete information group | Is it readable after filling? |
| Seam corridor | Decorative or deliberately clear area | Does flap movement cover anything important? |
| Right reliable area | Another complete information group | Does curvature reduce access? |
| Coding region | Agreed variable information | Can the line apply and inspect it? |
| Fold transitions | Low-priority graphic continuity | Does the artwork still make sense? |
This original map is not a fixed safe-zone prescription. The supplier must define the usable regions and any production constraints for the actual construction. Record those boundaries on the approved drawing rather than inventing universal seam margins.
Check the pack through ordinary handling
Fill and close the pouch with representative product. Turn it over as a buyer would, inspect the seam corridor and read the information without pulling every fold open. Photograph any hidden or interrupted line with the sample identity visible. Record whether the issue occurs consistently or only when a fold settles in a particular way.
GS1's standard distinguishes measurement conditions for filled flexible packs. Use a defined filled state when recording the back's presentation. A nominal flat width alone cannot describe how much of the back appears comfortably readable in use.
Review the customer's reading sequence
Ask a reviewer to identify the product, turn the pack over and locate one specific information group. Observe the movement needed without asking them to pull folds open. Use the approved copy in the mock-up so the reading task is realistic. Placeholder text can conceal an actual line break or grouping problem.
Record the reason for each information group. Product details, instructions and contact information should remain internally coherent. If a block must move, move its label and explanation together. Splitting a heading from its text can create an interpretation problem even when every word remains technically visible.
Check side-fold transitions as part of the back review. A region near the edge may appear flat on the unfilled pouch and turn away when product expands the gusset. Record the filled state and orientation with the image so another reviewer can reproduce the view.
For a range, use a common grouping rule where sensible but allow different copy requirements. A long variant description may need a different arrangement from a short one. The objective is consistent information access, not forcing every SKU into equal-looking columns regardless of what the customer must read.
Coordinate code placement with packing
Ask the packing team to confirm the coding surface and access. A region clear of printed text may still be unsuitable if it folds or sits under the seam. Review variable information on a representative complete pack using the intended process, then retain the approved result as a reference.
An illustrative artwork correction might move a preparation instruction from a seam-spanning block to one uninterrupted side area. The goal is preserving a complete reading task, not forcing symmetrical columns. Let the artwork owner rebalance the remaining design around that functional decision.
Write a correction that the next proof can answer
Use a four-part issue record: sample identity, affected region, observed obstruction and required outcome. “Sample B, seam corridor, flap covers preparation step two; keep the complete step readable during normal handling” is actionable. It leaves the designer and converter room to propose a suitable arrangement.
Identify whether the cause belongs to the agreed construction, the artwork layout or a sample that differs from the proposal. A development mock-up may have an unrepresentative flap. Ask the supplier to explain that difference before rebuilding the design around it. Record which evidence will close the question.
When the next proof arrives, inspect the corrected block and any region affected by its relocation. Solving one obstruction can crowd the neighbouring code or contact area. Review the full back once after the targeted correction, then retain the accepted revision instead of continuing unrelated stylistic changes.
Keep the seam-aware map with the repeat-order references. If a future enquiry asks for a smaller size, use the map to identify which complete text groups must be reconsidered. That preserves the original reading decisions while allowing an intentional redesign for the new physical space.
Centre-seal gusset layout: a practical specification example
A pack is shortlisted for its shape, then its panels are divided between artwork and functional features. Work from the filled geometry: a bottom gusset, side gusset and flat base are distinct constructions. Establish where the product will settle, which panel the customer sees and which edge is used for filling. This prevents an artwork decision from silently changing the pack layout.
For this decision, start with the rear seam and folded side panels. The useful output is the seam, folds and usable artwork areas on one drawing. Put that output beside the relevant quotation, drawing or sample rather than leaving it in a separate email. This is an illustrative decision exercise, not a report of a completed customer trial.
Product references to make the discussion concrete
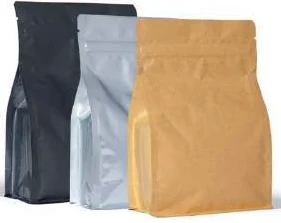
The catalogue includes flat-bottom pouches and side-gusset pouches. These examples show different physical constructions; they are not interchangeable specifications. A box-style base gives the filled pack a distinct footprint, with separate front, back and side panels. Compare a plain top opening with a regular zipper, and use filled samples to decide the shelf depth and panel proportions.
| Format reference | Material or construction to clarify | Details to include in the brief |
|---|---|---|
| Flat-bottom pouches | Flexible laminate with paper-look or opaque outer options; the appearance alone does not identify the full layer structure. | Base width and full opened depth; net fill and product bulk. |
| Side-gusset pouches | Paper-look and opaque or foil-look laminates are illustrated; confirm the actual inner and outer layers for the contents. | Face width and side-gusset convention; filled height and headspace. |
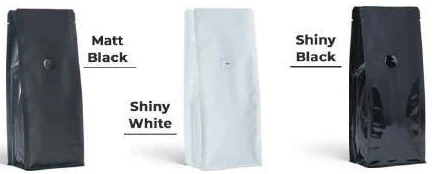
Use the reference pictures to identify the base, side panels, window or opening that you mean. A picture cannot supply the missing dimensions or material layers. If a photograph shows a finish or closure you do not want, state that difference explicitly; otherwise a visual reference can introduce an unintended requirement.
Complete the record before requesting the next sample
- Attach the seam, folds and usable artwork areas on one drawing. Identify the product or SKU and the date of the observation.
- Record the rear seam and folded side panels. Keep confirmed information separate from proposed values and questions for the supplier.
- Add the actual fill weight or volume, the dimension convention, material proposal and intended closure. Include the number of designs and quantity per design when requesting a quotation.
- State which question the next drawing, sample or quotation must resolve. A change of size, closure or material should remain visible alongside the earlier reference.
This record makes the next conversation specific. It lets the design, purchasing and packing teams work from the same proposed item and shows which decision still needs evidence. Review the related product pages for format details, or prepare a custom packaging brief with the unresolved requirements.

Freeze the seam detail with the artwork
Release the seam map, drawing and artwork as linked revisions. If the supplier proposes a different seal orientation, review the back again even if outside dimensions are unchanged. Include the affected content and coding area in the change record.
Send Navkar Poly Print the filled reference, seam-aware map and coding requirement. Ask for the construction detail needed to finalise a readable layout, with any uncertain back-panel region resolved before the production artwork is approved.
Sources and scope.
These references support the technical discussion. Product photographs illustrate formats; the material, dimensions and suitability of the proposed pack are confirmed for each project.
- Quantum Packaging: measuring a side-fold pouch
Named total height, width and side-gusset measurement convention; not a universal capacity chart.
- GS1 Package and Product Measurement Standard
Distinguishes measurement treatment for different filled flexible-pack types; does not set converter tolerances.
- GS1: barcode placement in packaging
Placement guidance considers folds, flaps, packaging process and printing; project-specific symbol specifications still apply.
Let’s discuss your product.
Share your contents, dimensions, filling method, quantity and delivery destination. We’ll work through the proposed packaging specification with you.
Create a packaging brief