Design a centre-seal pouch around the visible front, the working back seam and the two end regions. Decide which face the buyer should recognise first and where supporting information can be read after filling. A continuous rectangle of artwork needs a clear physical map before it becomes a reliable pack layout.
Define the purchased form and packing route
State whether you need supplied premade centre-seal pouches or a printed film route for your existing packing equipment. These are different procurement handovers. Give the converter the relevant line information through the packing owner instead of assuming one file and sample can serve both routes.
Identify the final opening, back seal and end regions on a physical reference. If you only have a competitor's pack, use it to explain the intended format and handling task; do not copy its graphics or assume its material and dimensions are suitable. Request a project drawing for the actual proposal.
Identify the real front on the finished pack
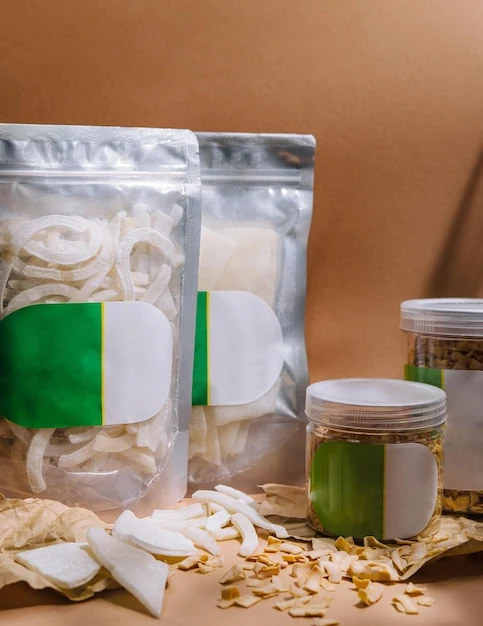
Ask how the pack is presented after filling: lying on a shelf, within a tray, hanging or another defined arrangement. Mark the face intended to meet the customer first. A front chosen in the artwork file may turn away or curve once the product fills the body.
Prepare a simple orientation mock-up with front, back and end labels. Follow it through the intended forming or pouch-filling route at a requirement level with the packing owner. Record which face receives coding and which edge the user opens. This resolves physical relationships before the design depends on them.
For an illustrative snack range, one supplier proof shows the front correctly while the finished display folds the upper end across the variant name. The appropriate correction depends on the agreed display: relocate the cue, change the arrangement or review the geometry. Expanding the logo alone would not answer the observed problem.
Keep the output identity clear when discussing rollstock and premade components. A repeated film layout and a converted pouch drawing are different references. If the buying route changes, ask the converter and line owner to reconcile the artwork basis before carrying an old approval into the new proposal.
Give the front one clear recognition task
Prioritise product identity and variant in the area that remains visible when the pouch is filled and displayed. A crowded front can make a small variant cue difficult to find, especially when curvature changes the apparent width. Review a mock-up at normal viewing distance and under the intended display arrangement.
Keep the product image and important wording clear of uncertain folds or seal transitions. The artwork owner should decide the final hierarchy using the approved copy. Do not solve every space conflict by shrinking text; reconsider panel allocation or the underlying size proposal where necessary.
Give variant recognition its own review
Place the proposed variants together in the intended arrangement. Ask reviewers to identify product and flavour from the normal viewing position. Record which cue they used and which cue was obscured. This is a practical design review, not proof of a sales or preference uplift.
Use both a range view and a single-pack view. The range view shows whether variants are distinguishable; the single-pack view shows whether the product identity makes sense without its neighbours. A colour system should support the approved product wording rather than carry the whole identification task.
Check how imagery moves around the filled edges. An ingredient picture partly hidden by curvature may change the apparent emphasis of the front. The content owner should assess the actual representation for the SKU. A flat proof cannot show every consequence of the product's filled profile.
Record the decision with a marked image and the complete artwork reference. “Variant B difficult to identify because the tray covers the lower cue” states a specific issue. The designer can then revise the cue or arrangement deliberately and show the result in the same view for the next review.
Map the back and end regions
Glenroy's fin-seal web layout separates face, back and clear regions and records repeat, web width and eye-mark location. Use those explicit references when asking the converter to map your actual seam and end regions. The template is a primary construction reference, not a replacement for the proposed supplier's layout or the receiving line's requirements.
Locate the code region with the packing team. Keep it accessible for the intended application and inspection process. Review whether the back seam interrupts a text block, and whether folding an end for display hides an instruction. If the pack is hung or placed flat, test that actual presentation rather than an unsupported standing mock-up.
Coordinate fixed identifiers and production codes
GS1's placement guidance requires attention to packaging features and print orientation. On a centre-seal construction, review the actual back seam and end regions through the responsible packaging and printing teams. The guide does not establish a universal position for every pouch.
List fixed artwork identifiers separately from variable information applied during packing. Give each a source file or data owner, a proposed region and an inspection task. If the same region is expected to serve both, confirm that the two processes and information needs are compatible.
Ask the packing owner to check access before approving a decorative background beneath a code. A region can be visually clear yet difficult to present to the intended coding equipment. Retain the accepted coding arrangement on the construction reference so a later graphic refresh does not move it silently.
For an illustrative correction, detailed copy is moved away from the back seam, but the new block crowds a fixed identifier. Close the original reading issue only after the identifier reviewer accepts the revised region. Targeted correction still needs a short check of neighbouring functions that the move affected.
Use a recognition-and-detail worksheet
| Region | Primary task | Sample review |
|---|---|---|
| Front centre | Product recognition | Readable at intended display distance |
| Variant area | Distinguish the SKU | Clear when packs sit together |
| Back reliable area | Supporting information | Complete reading without seam obstruction |
| End regions | Functional closure and graphic transition | No critical information hidden |
| Code region | Variable identification | Accessible to the packing process |
This original worksheet separates front recognition from detailed reading. Both matter, but they should not compete for the same limited space without a deliberate decision.
Review the filled object and its orientation
Fill and close a representative sample. Place it in the intended display and turn it through the normal customer handling sequence. Record which face appears first, whether the variant remains visible and how the back information can be read. Glenroy's graphics guidance asks for an accurate dieline and web layout when reviewing preliminary artwork. Keep your filled observations linked to those controlled layout references.
An illustrative review may find the front is clear on a flat proof but a product illustration curves around the filled edge. Move or resize the illustration on the approved map, then review the new physical mock-up. The sample observation should lead the correction.
Review ends as functional regions
End regions carry the transition between the body and the closing arrangement. Mark their boundaries using the supplier's drawing and ask how the finished pack will be opened. Keep required instructions out of areas that are intentionally removed or hidden during ordinary presentation, according to the agreed layout.
Observe the remaining pack after first opening. The front and back may still need to identify the product and support later use. If the component is single-use, review complete product removal. If repeated use is intended, include the opening and any specified reclosure arrangement in a separate task record.
Avoid extending a graphic across an end region without checking the assembled result. Decorative continuity may be acceptable, while a sentence split across that region may become misleading. Record which graphic relationships are essential and which can tolerate the normal physical interruption.
When a size or end construction changes, revisit the affected front hierarchy, back groups and code location. Preserve the rest of the accepted layout where its evidence remains applicable. A clearly bounded revision gives the project a stable reference while allowing the physical pack to evolve through its actual filling, display and use requirements.
Panel artwork: a practical specification example
A pack is shortlisted for its shape, then its panels are divided between artwork and functional features. Work from the filled geometry: a bottom gusset, side gusset and flat base are distinct constructions. Establish where the product will settle, which panel the customer sees and which edge is used for filling. This prevents an artwork decision from silently changing the pack layout.
For this decision, start with the visible faces and closure boundaries. The useful output is the complete artwork set rather than the front face alone. Put that output beside the relevant quotation, drawing or sample rather than leaving it in a separate email. This is an illustrative decision exercise, not a report of a completed customer trial.
Product references to make the discussion concrete
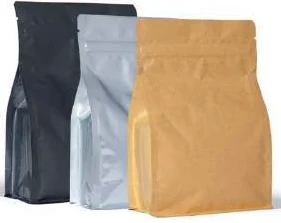
The catalogue includes flat-bottom pouches and side-gusset pouches. These examples show different physical constructions; they are not interchangeable specifications. A box-style base gives the filled pack a distinct footprint, with separate front, back and side panels. Compare a plain top opening with a regular zipper, and use filled samples to decide the shelf depth and panel proportions.
| Format reference | Material or construction to clarify | Details to include in the brief |
|---|---|---|
| Flat-bottom pouches | Flexible laminate with paper-look or opaque outer options; the appearance alone does not identify the full layer structure. | Base width and full opened depth; net fill and product bulk. |
| Side-gusset pouches | Paper-look and opaque or foil-look laminates are illustrated; confirm the actual inner and outer layers for the contents. | Face width and side-gusset convention; filled height and headspace. |
Use the reference pictures to identify the base, side panels, window or opening that you mean. A picture cannot supply the missing dimensions or material layers. If a photograph shows a finish or closure you do not want, state that difference explicitly; otherwise a visual reference can introduce an unintended requirement.
Complete the record before requesting the next sample
- Attach the complete artwork set rather than the front face alone. Identify the product or SKU and the date of the observation.
- Record the visible faces and closure boundaries. Keep confirmed information separate from proposed values and questions for the supplier.
- Add the actual fill weight or volume, the dimension convention, material proposal and intended closure. Include the number of designs and quantity per design when requesting a quotation.
- State which question the next drawing, sample or quotation must resolve. A change of size, closure or material should remain visible alongside the earlier reference.
This record makes the next conversation specific. It lets the design, purchasing and packing teams work from the same proposed item and shows which decision still needs evidence. Review the related product pages for format details, or prepare a custom packaging brief with the unresolved requirements.
Keep the release connected to the component
Link the approved graphics, drawing, code region and sample identity. A repeat order should specify the released revision, not merely “same design.” If the seam or end construction changes, reopen the affected panel review.
Send Navkar Poly Print the recognition-and-detail worksheet, desired packing route and actual product brief. Ask for the drawing and sample needed to resolve the front, back and end relationships before production artwork is frozen.
Sources and scope.
These references support the technical discussion. Product photographs illustrate formats; the material, dimensions and suitability of the proposed pack are confirmed for each project.
- Glenroy: fin-seal form-and-fill web layout
Manufacturer template directly identifies face, back, clear regions, web width, repeat, rewind and eye-mark fields; no dimensions or machine compatibility transferred.
- Glenroy: graphics specifications
Manufacturer explicitly requests an accurate dieline and web layout for preliminary-art review; no supplier-specific numerical print rules adopted.
- GS1: barcode placement in packaging
Placement guidance considers folds, flaps, packaging process and printing; project-specific symbol specifications still apply.
Let’s discuss your product.
Share your contents, dimensions, filling method, quantity and delivery destination. We’ll work through the proposed packaging specification with you.
Create a packaging brief