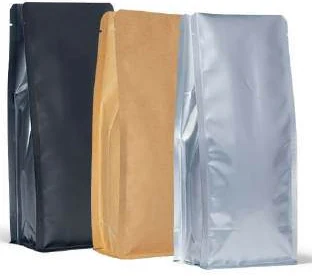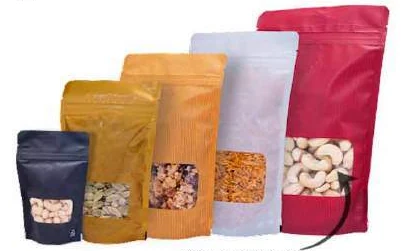
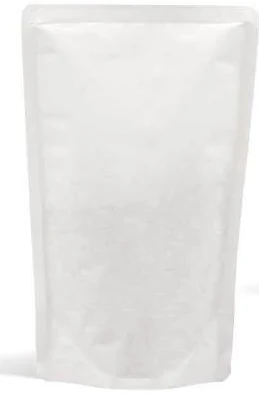
Choose a clear window only after defining what buyers need to see and what exposure the product can tolerate. Choose an opaque presentation when it better serves the product and information layout, with the actual construction technically qualified. Transparency is a visual property; it is not a complete barrier specification. A visibility brief helps the brand explain the merchandising objective while the technical team reviews the proposed material and storage conditions.
Specify the merchandising purpose
Write down what the window is intended to show: piece size, colour variation, mixture or remaining quantity. Ask how much of that view stays visible after filling and settlement. An oversized window can displace information without improving the shopper's understanding. Use a filled prototype at the proposed viewing distance and orientation. For an opaque option, show how images or information will communicate the product honestly. Keep this comparison focused on visibility rather than assuming that a window is automatically more credible or that an opaque pouch is inherently premium.
Keep technical questions separate from appearance
Ask the technical team to evaluate the product's sensitivity and intended exposure conditions. Obtain structure-specific evidence where oxygen, moisture or light control matters. Do not infer protection from colour, thickness, metallic appearance or the absence of a window. Likewise, do not assume all transparent constructions have the same performance. A proposed window can change the package construction or printed coverage, so obtain a clear description of what is changing and which evidence applies to the complete proposal. Avoid a shelf-life promise unless an appropriate product qualification programme supports it.
Review the filled view and the information layout
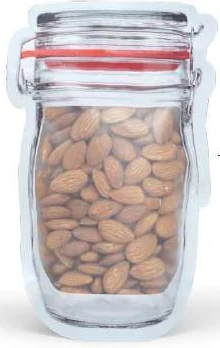
Place a window outline on the structural drawing and reserve the agreed functional areas. Check where the product settles relative to that outline, including the appearance of a partially empty view if relevant. Ask the artwork owner to verify that required content remains legible in the available space. A window cannot serve as a dependable background for small text when the contents vary behind it. Record the approved product representation and window position together; changing the product blend may alter the view even if the packaging file remains unchanged.
Create a visibility and exposure brief
Use the following record to compare a clear, windowed and opaque candidate without treating those words as material specifications. The aim is a useful visual decision with a separate technical approval path.
| Record | What to capture and how to use it |
|---|---|
| Visible product feature | State exactly what the shopper should learn from the view. Use that purpose to choose the visible region and assess whether the actual filled sample communicates it, instead of specifying a window only by fashion or competitor appearance. |
| Window geometry | Show location, size and orientation on the agreed drawing. Include folds, seals and fill level so the converter and designer can identify whether the proposed view remains useful after the pack takes its filled shape. |
| Exposure conditions | Record intended lighting, display and storage conditions as available. Ask the technical owner which product and material evidence is required; a visible or opaque appearance should not be accepted as a substitute for that review. |
| Construction evidence | Request the proposed material description and relevant test information for the complete candidate. Identify differences between the windowed and opaque options, and avoid transferring a report from another structure without a documented technical basis. |
| Content layout | Identify the text and graphics displaced by the window. Review legibility on a filled specimen with representative contents, then keep the agreed window and artwork revision together as the visual approval baseline. |
Document the technical reviewer and the visual reviewer separately. They may approve different aspects of the same sample, and keeping those responsibilities explicit prevents a design signoff from being treated as a product-protection decision.
Illustrative mixed-product window review
A mixed dry-product brand wants shoppers to see the assortment. A low window mainly reveals the smallest pieces after settlement, creating an unrepresentative first impression. The team moves the proposed window and reviews another filled prototype. It also checks the changed information layout and asks the technical owner to assess the final construction. This is a visibility improvement demonstrated on that sample. It does not establish a storage duration or prove that every future assortment will settle in the same way.
Mondi gives format context. Mespack provides the separate equipment-route reference.
Specify the optical question separately
“Clear” can mean that a shopper recognises the product, sees individual pieces or reads information behind a film. Those are different visual tasks. Write the intended task beside the window drawing and examine it with the actual product colour and surface. Reflections, folds and the background behind a partly empty pack can alter the view even when the film is visibly transparent.
If technical optical evidence is needed, ask which property and method were measured. Visible transparency alone does not describe protection from all relevant wavelengths. Likewise, an opaque print appearance does not establish a quantified light barrier. The product owner should identify the exposure concern so the supplier can respond with relevant construction-specific evidence rather than a visual adjective.
Understand why transparency does not settle barrier
Fraunhofer FEP describes transparent aluminium-oxide barrier coatings. This is a direct counterexample to treating every transparent film as the same barrier class. Its leaflet reports different substrate results and explicitly says values can vary with the substrate. Those findings describe the reported coated films, not a Navkar construction or finished pouch.
Ask the supplier for the exact proposed structure, the tested specimen and the stated conditions. If a quotation offers a printed clear window, establish whether only ink coverage changes or whether the construction changes too. A design review can then address visibility while the technical review addresses the actual product-protection requirement. Keep the two decisions linked through the same revision reference.
Observe product settlement through the window
Fill and orient the specimen as intended, then record the condition at observation. A mixture can separate by piece size or movement; a low window can therefore show a different view from a higher one. This is a reason to examine representative samples, not a universal prediction about every product. Photograph the visible assortment together with the full pack and its declared orientation.
Try the proposed position at more than one practical viewing angle. Note whether the sealed edges, front folds or retail tray obscure the useful view. If changing the window size merely exposes more empty headspace, it may add little value. A smaller, better-positioned view may answer the merchandising task while leaving more room for clear information. Assess that possibility on a filled layout.
Compare the communication space fairly
Print a layout for each candidate at actual size and assemble it around a relevant sample. Check the product description, required information and any proposed use instructions. Avoid shrinking text automatically to recover area lost to a window. First ask whether the window can move, whether secondary graphics can simplify or whether the pouch dimensions need another review.
For an opaque option, use an image or illustration that accurately represents the proposed product. Mark any visual mock-up as such during review. The comparison should ask what information each approach communicates, including realistic product variation. It should not assume that either a real view or a printed picture will increase sales without suitable evidence.
Give the supplier a view and an exposure condition
Attach two references to the enquiry: an annotated visual layout and a technical exposure brief. The first shows what the shopper should see. The second states product sensitivity information available to the buyer, expected storage or display conditions and the evidence requested for review. Link both to the same proposed construction.
If a later design changes the window, record whether the technical construction remains identical. If it changes, ask which existing evidence still applies. If only print coverage changes, the visual and light-related consequences may still need assessment. This disciplined distinction allows a useful design choice while keeping the eventual product-protection conclusion tied to evidence rather than the appearance of the sample.
Clear versus opaque: a practical specification example
A brand is choosing a dry-food pack before commissioning artwork. Compare the same product in two filled samples, using the same net weight and display space. The useful difference may be the usable opening, footprint or closing method rather than the empty pouch silhouette. A window or valve is another specification within a format, so it should not silently replace the original comparison.
For this decision, start with how much of the product must be visible on shelf. The useful output is the proposed viewing area and the remaining print panel. Put that output beside the relevant quotation, drawing or sample rather than leaving it in a separate email. This is an illustrative decision exercise, not a report of a completed customer trial.
Product references to make the discussion concrete
The catalogue includes flat-bottom pouches and window pouches. These examples show different physical constructions; they are not interchangeable specifications. A box-style base gives the filled pack a distinct footprint, with separate front, back and side panels. Compare a plain top opening with a regular zipper, and use filled samples to decide the shelf depth and panel proportions.
| Format reference | Material or construction to clarify | Details to include in the brief |
|---|---|---|
| Flat-bottom pouches | Flexible laminate with paper-look or opaque outer options; the appearance alone does not identify the full layer structure. | Base width and full opened depth; net fill and product bulk. |
| Window pouches | A transparent window combined with paper-look or opaque flexible panels; confirm the full structure and product requirements. | Window width, height and location; product visibility at full and low fill. |
Use the reference pictures to identify the base, side panels, window or opening that you mean. A picture cannot supply the missing dimensions or material layers. If a photograph shows a finish or closure you do not want, state that difference explicitly; otherwise a visual reference can introduce an unintended requirement.
Complete the record before requesting the next sample
- Attach the proposed viewing area and the remaining print panel. Identify the product or SKU and the date of the observation.
- Record how much of the product must be visible on shelf. Keep confirmed information separate from proposed values and questions for the supplier.
- Add the actual fill weight or volume, the dimension convention, material proposal and intended closure. Include the number of designs and quantity per design when requesting a quotation.
- State which question the next drawing, sample or quotation must resolve. A change of size, closure or material should remain visible alongside the earlier reference.
This record makes the next conversation specific. It lets the design, purchasing and packing teams work from the same proposed item and shows which decision still needs evidence. Review the related product pages for format details, or prepare a custom packaging brief with the unresolved requirements.
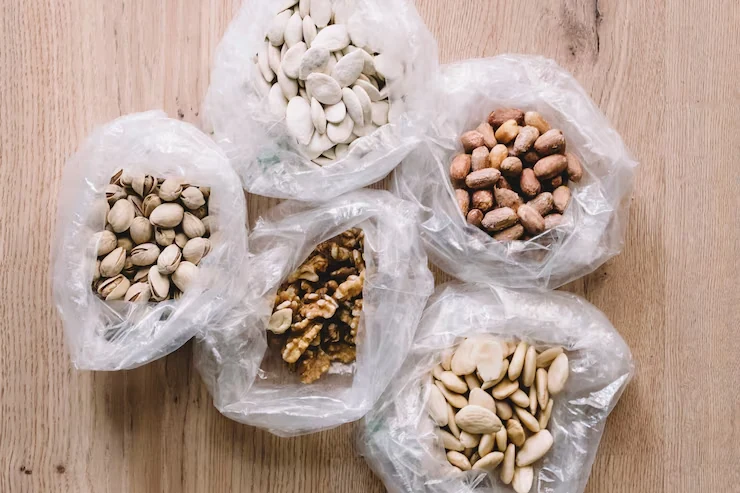
Approve the view with its supporting specification
Retain the filled visual reference, window drawing and artwork revision. Link them to the approved construction and the technical evidence applicable to the product. If changing printed coverage, window size or product appearance later, identify which visual and technical reviews need repeating. A clear brief lets suppliers propose a reviewable solution without making unsupported claims about a package merely because its contents can or cannot be seen.
Send the completed visibility and exposure brief with your product and filling details to Navkar Poly Print for a project-specific discussion. Ask for the proposed specification, evidence required and open questions to be recorded before quotation approval.
Sources and scope.
These references support the technical discussion. Product photographs illustrate formats; the material, dimensions and suitability of the proposed pack are confirmed for each project.
- Mondi stand-up pouch
Primary format reference; does not establish the performance of another supplier's pack.
- Mespack solution finder
Equipment supplier distinguishes rollstock and premade-pouch routes; no Navkar equipment inference.
- Clear barrier films for packaging applications
Institute leaflet describes transparent aluminium-oxide coatings and substrate-dependent film data; not finished-pouch or shelf-life evidence.
Let’s discuss your product.
Share your contents, dimensions, filling method, quantity and delivery destination. We’ll work through the proposed packaging specification with you.
Create a packaging brief