
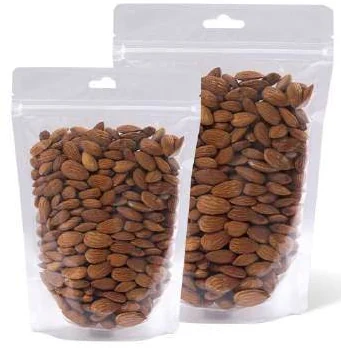
For a three side seal pouch, confirm the edge supplied open, usable loading access and final closure responsibility. The buyer needs to know how the actual product enters the pouch, not simply whether the product fits inside its external dimensions.
Mark the supplied opening
Identify each preformed seal and the remaining opening on the drawing. Record which edge is the top for the intended artwork and how the pack reaches the filling station. SEE publishes a three-side-seal format sheet, but the exact supplied condition still belongs in your project specification.
State whether the contents are loose product, an individual item or an already packed assortment. The loading task differs, and product-contact requirements need the appropriate technical assessment. External width and height alone cannot resolve access around an awkward item.
Separate internal fit and insertion
Use a representative contents envelope to review both the final position and the route into the pouch. A product may occupy acceptable internal space but need a different insertion orientation. Ask the packing team to demonstrate its intended route using an appropriate sample and approved procedure.
Keep final closure requirements with the team responsible for filling and sealing. Do not specify operating settings from a sample photograph. Record the accepted drawing and process references once the relevant specialists have assessed the actual combination.
Review format alternatives precisely
Craftz's four-side-seal-with-gusset example illustrates a different construction vocabulary. If another format is proposed to solve access, compare the real opening, folds and final configuration. A format change should have a clear reason and its own evidence.
Follow the item through the opening
Sketch the loading sequence from the pouch as received to the final contents position. For an individual item, mark the leading edge, the widest part and any orientation change. Include the inner wrapping and accessories that enter with it. Ask the packing team to describe where support is needed under its authorised procedure. This may reveal that the critical question is passage through the mouth rather than the space available once the item is inside.
For loose product, ask the product and line owners to define the relevant loading behaviour and equipment interface. A rigid contents envelope is not a useful substitute for those details. Record the product identity and condition represented by the proposed sample review. If the product changes form, size distribution or packing method, route that change to the responsible specialists. The procurement team should collect the information rather than prescribe a filling solution from a generic format description.
Identify the supplied pouch state
The supply drawing should distinguish the preformed seals from the interface the filling team receives open. Include artwork orientation and how the pouch is presented to the loading station. Mespack describes pre-made pouch handling as feeding, transfer, opening, filling and final sealing stages. Use that separation to organise questions for your own line team. It is equipment context, not proof that any proposed three-side-seal pouch will run on a particular machine.
Ask whether the offered sample has the same opening, construction and dimensions as the production proposal. If the sample is hand-made, unprinted or made from a substitute material, list those differences. Some differences may be acceptable for a limited loading observation; others may prevent a useful comparison. The responsible reviewer should state which conclusions are supported. Keep that statement with the sample identity so it is not lost when photographs move into a purchasing presentation.
Observe loading without changing several variables
Start with one identified pouch candidate and one defined contents state. Have the packing team use its agreed procedure and record what happens at the relevant interface. Note whether the item reaches its final position, whether the intended orientation is maintained and where the operator reports an access difficulty. Do not change pouch size, contents orientation and packing order simultaneously and then attribute the result to one of them.
If a change is proposed, give it a specific reason. A wider opening may address entry access; a different item orientation may address passage; a different construction may address the final arrangement. Compare the revised candidate against the same identified task. The review should produce a clear statement of what changed and what observation followed. It should not imply validated packing speed or production yield unless an appropriate separate evaluation has actually established those results.
Preserve the final closure area
The loading task ends with contents positioned for the responsible closure operation. Ask the line team to identify its requirements for the remaining edge and the information it needs from the converter. Keep these requirements tied to the actual equipment and product assessment. Do not suggest operating temperature, pressure or dwell time from a picture or an unrelated material example. Those decisions require the appropriate process evidence and competent ownership.
Record observations about the closure area without diagnosing their cause prematurely. A wrinkle, displaced item or visible product near the intended seal line needs a photograph and sample reference. The relevant specialists can assess whether the cause relates to loading, pouch construction, product behaviour or another factor. State any containment decision through the buyer's procedure. Visual appearance alone does not establish seal integrity, and an accepted loading route does not replace final-pack requirements.
Use a two-path loading example
Consider an illustrative flat gift item with a projecting tab. Route A inserts the broad face first; route B rotates the item before insertion and returns it to the final orientation inside. Draw both paths on the same candidate pouch and ask the packing team which can be assessed under its authorised procedure. Record the tab position, any support and the final closure clearance. These are observations of a defined task, not a recommendation to manipulate every product in the same way.
If route B appears more practical, ask whether its instruction is clear enough for the intended packing operation. If neither route works, specify the unresolved access requirement before asking for a revised pouch. A request to make the whole pouch bigger may create excess space without addressing the projecting tab. The drawing and loading notes help the converter propose a relevant alternative, which can then be reviewed through the same controlled sequence.
Issue an opening and closure handover
Prepare a short handover page showing the empty supplied pouch, loading edge, contents identity, insertion route and final orientation. Include the controlled drawing, sample reference and the closure requirement owner. Separate observations accepted during development from technical questions still under assessment. This lets procurement request the correct construction while the packing team retains responsibility for its approved process.
When the item or its inner pack changes, compare the new envelope and route with the accepted page. A visually similar item can introduce a different projection or wrapping seam. Ask the relevant owner whether the existing evidence remains applicable and record the reason. A useful three-side-seal specification therefore preserves the relationship between opening, contents and final edge throughout repeat orders, rather than treating the initial external dimensions as the complete requirement.
Illustrative loading exercise
For a hypothetical gift insert, draw the item in its final position and then sketch its entry path. Record whether the packing team rotates the item or needs support to keep it aligned. Use that observation to discuss the opening, rather than automatically increasing every outside dimension. If the proposal changes the seal area or print orientation, update those references too. The exercise can reveal whether the issue is final internal fit, insertion access or the packing method, allowing the buyer to request a specific revision instead of a vague larger pouch.
A working record for this decision
Use this original worksheet with your product and supplier team. Give each row a named owner and evidence reference; a blank answer remains an open decision.
| Record | What to enter and why |
|---|---|
| Supply condition | Identify three preformed seals, remaining opening and artwork orientation. |
| Contents envelope | Record representative product dimensions or bulk behaviour and intended final position. |
| Loading route | Sketch the insertion path and any orientation changes within the approved packing procedure. |
| Final closure | Identify responsible equipment or team and the accepted technical references. |
| Alternative scope | Record why another construction is proposed and which fit, artwork or process decisions it changes. |
Four-side seal: a practical specification example
A special retail profile must still provide a usable cavity and a practical opening. A hanging header, die-cut outline or carrying feature occupies material that cannot automatically be counted as product space. Start with a drawing of the actual product envelope, then place the feature and the artwork. Compare the filled pack on the intended fixture rather than judging only the flat silhouette.
For this decision, start with the product cavity and filling edge. The useful output is the complete seal layout and usable internal area. Put that output beside the relevant quotation, drawing or sample rather than leaving it in a separate email. This is an illustrative decision exercise, not a report of a completed customer trial.
Product references to make the discussion concrete
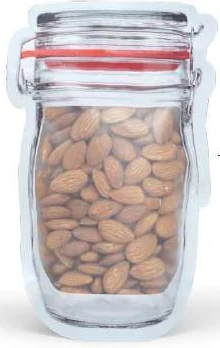
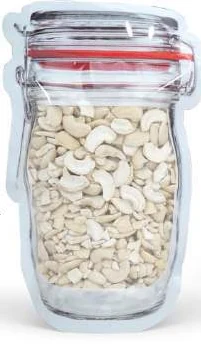
The catalogue includes jar-shaped zipper pouches and hanging display pouches. These examples show different physical constructions; they are not interchangeable specifications. A contoured outline gives the pouch a jar-like silhouette while retaining a flexible pack construction. The narrow shoulder and top opening affect filling and access. Review the usable cavity, zipper length and artwork boundaries on a dimensioned drawing before committing to the shape.
| Format reference | Material or construction to clarify | Details to include in the brief |
|---|---|---|
| Jar-shaped zipper pouches | Clear or frosted flexible pouch construction with a zipper; the jar shape is a profile, not a rigid container. | Usable cavity and narrowest opening; die-cut outline and corner radii. |
| Hanging display pouches | Clear or opaque flexible pouch construction with a punched hanging feature; final material and reinforcement are reviewed for the fill. | Retail hook and hole dimensions; filled weight and hanging orientation. |
Use the reference pictures to identify the base, side panels, window or opening that you mean. A picture cannot supply the missing dimensions or material layers. If a photograph shows a finish or closure you do not want, state that difference explicitly; otherwise a visual reference can introduce an unintended requirement.
Complete the record before requesting the next sample
- Attach the complete seal layout and usable internal area. Identify the product or SKU and the date of the observation.
- Record the product cavity and filling edge. Keep confirmed information separate from proposed values and questions for the supplier.
- Add the actual fill weight or volume, the dimension convention, material proposal and intended closure. Include the number of designs and quantity per design when requesting a quotation.
- State which question the next drawing, sample or quotation must resolve. A change of size, closure or material should remain visible alongside the earlier reference.
This record makes the next conversation specific. It lets the design, purchasing and packing teams work from the same proposed item and shows which decision still needs evidence. Review the related product pages for format details, or prepare a custom packaging brief with the unresolved requirements.
Put the decision into practice
1. Draw the opening. Agree the supplied pouch condition before discussing a final filled-pack photograph.
2. Observe loading. Have the packing team review entry access and final fit using representative contents.
3. Resolve the interface. Route closure and construction changes to the responsible technical reviewers.
4. Release the final edge. Connect the accepted supply drawing, packing route and finished configuration in the order file.
Provide Navkar Poly Print the contents envelope and marked loading edge when asking for a three side seal pouch review.
Sources and scope.
These references support the technical discussion. Product photographs illustrate formats; the material, dimensions and suitability of the proposed pack are confirmed for each project.
- SEE: Three Side Seal Pouches
Manufacturer format reference for a three-side sealed pouch; supplied features and suitability are not transferred to Navkar.
- Craftz: four-side seal pouches with gusset
Manufacturer format example demonstrates why drawings are needed to distinguish seal and gusset constructions.
- Mespack: Pre-Made Pouch Packaging Machine
Manufacturer describes pouch feeding, transfer, opening, filling and top-sealing stages; supports identifying interfaces, not compatibility with any Navkar construction.
Let’s discuss your product.
Share your contents, dimensions, filling method, quantity and delivery destination. We’ll work through the proposed packaging specification with you.
Create a packaging brief