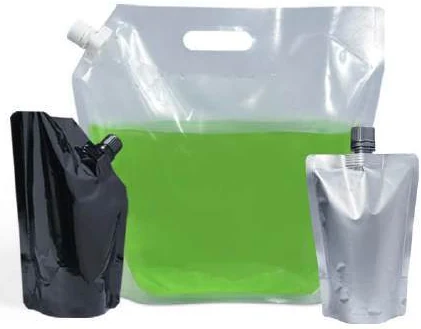
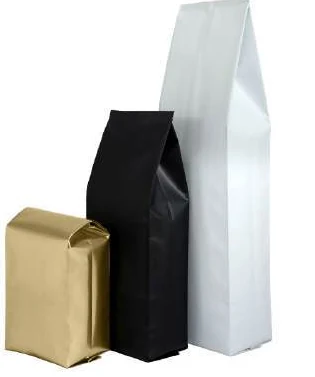
Compare stand-up and flat-bottom pouches after filling them with the intended product quantity. Flat dimensions alone cannot show how either pack will occupy a shelf, reveal its artwork or behave during use. The right choice depends on the filled geometry and the way the product is sold. Use the same product, display context and approval questions for both candidates before deciding whether the extra structural complexity is useful.
Describe the base and the visible panels
Ask for an annotated drawing of each candidate rather than relying on product photographs. Identify the base construction, gussets, side panels, seals and opening. These features influence where text and graphics can sit and what becomes visible when the pouch expands. Do not assume that a larger flat front provides a larger readable front after filling. Build a simple paper panel map for each design and mark folds. Keep important information away from areas that the agreed layout identifies as seals, folds or otherwise unsuitable for critical content.
Measure shelf use with filled samples
Place each candidate in the intended tray or shelf space and observe it from the shopper's viewing direction. Record front width, occupied depth and how the face changes as product settles. If the pack is sold in multiples, examine a row rather than one carefully arranged specimen. Ask whether staff can restock it without excessive rearrangement. A pouch that stands briefly in an office is not evidence for every retail condition. Agree the conditions of the review and document where the sample was supported by a tray or neighbouring packs.
Check use and dispatch as part of the comparison
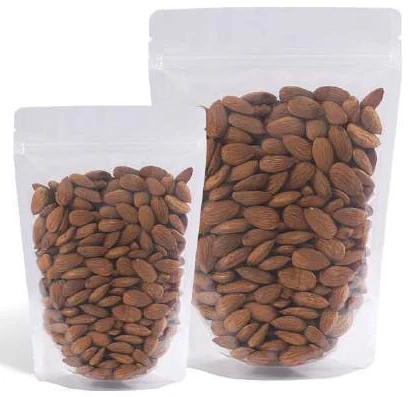
Review access through the opening, any reclosure and how the pack is held when partly empty. Then pack equal product quantities into the proposed outer cartons. A more angular filled shape may change arrangement options, but the actual result depends on dimensions, product and carton design. Do not promise freight savings from appearance. Compare carton count, dimensions and gross mass using a demonstrated pack-out. Keep material construction and product qualification on a separate track because neither a stand-up base nor a flat bottom specifies the required barrier or contact evidence.
Use a filled-footprint comparison card
Photograph both specimens with identification labels and a scale reference. Use the card to distinguish observations from expectations and to identify the sample revision behind each finding.
| Record | What to capture and how to use it |
|---|---|
| Filled footprint | Record the occupied width and depth using an agreed measurement method and the actual fill quantity. Note whether a tray or neighbouring packs supported the specimen; do not treat unsupported and supported observations as equivalent. |
| Readable face | Mark the visible brand and information panels after filling. Record text obscured by curves, folds or settlement so the artwork team can correct the layout before approving production graphics. |
| Opening access | Observe the intended dispensing or removal action with a representative product. Record grip, access and reclosure questions separately, because a convenient opening does not establish the integrity of the original final seal. |
| Carton arrangement | Draw the proposed orientation and count per carton, then record measured dimensions and gross mass. Use this evidence for a transport quotation rather than assuming a particular base format always packs more efficiently. |
| Approval boundary | Identify product variant, fill quantity, drawing revision and sample type. State which shelf and handling observations are accepted and which technical tests remain outstanding so the geometry decision is not misread as full qualification. |
Request corrections against the observed issue: for example, a panel that curves out of view or a pack that exceeds the allotted depth. Specific findings help both candidates improve and keep the comparison fair.
Illustrative shelf review
A retailer allocates a fixed tray depth to a 500 g dry product. A stand-up candidate fits the tray but its lower artwork is partly hidden. A flat-bottom candidate presents the lower panel differently but occupies more of the proposed depth. The buyer does not award an overall winner from those two observations. The artwork team relocates the critical content on the first candidate, while the converter explores an appropriate dimensional revision for the second. Revised filled samples return to the same tray, preserving a comparable review.
Mondi describes the stand-up format. Mespack distinguishes filling-route choices.
Make a filled geometry comparison
An empty pouch drawing describes manufactured dimensions; it does not show exactly how the product will occupy the base. Arrange representative filled samples on the intended fixture. Use the same product quantity, filling method and observation condition for both formats. Note whether the pack was freshly filled, allowed to settle or deliberately arranged by hand, because these conditions can change its apparent shape.
Measure the space occupied at the widest points and record the front-facing panel that remains readable. A flat-bottom outline may suggest a rectangular base, but the filled product and construction still determine the observed footprint. A stand-up pouch's base deployment also deserves examination. Avoid comparing a carefully posed sample with another sample taken directly from a carton.
Examine support and access together
Place each candidate where a customer will reach for it. Observe whether neighbouring packs provide support, whether the front face turns away and whether the top remains accessible. A candidate that looks stable alone may behave differently when only a few units remain. A crowded tray can also hide a panel or interfere with the intended opening grip.
Mondi's stand-up pouch page is a manufacturer example of this format. It does not establish comparative stability for a buyer's product. Use the format description to identify a candidate, then let the filled fixture observation answer the specific support and access questions. Write observations in physical terms rather than concluding that one geometry is universally more premium.
Calculate facings without treating them as sales
Suppose an illustrative shelf section has 600 mm usable width. A filled candidate occupying 100 mm across could fit six units in a single row under a simple arithmetic layout. Another occupying 120 mm could fit five. The calculations are 600 divided by 100 and 600 divided by 120. They ignore clearance, shelf fittings and natural variation, which must be checked physically.
This comparison describes a possible arrangement; it does not predict purchase intention or sales. A larger front panel may communicate differently while occupying more space. Ask the retail team which outcome matters: number of facings, information visibility, accessible stock or compatibility with an existing tray. Keep those requirements separate so one convenient number does not decide the whole format.
Review the base after realistic handling
Inspect the base before and after the agreed handling sequence. Look for where the product rests, whether the base opens consistently and whether a fold obstructs the intended standing surface. Record what happened without diagnosing an unseen material cause. A photograph from the front, side and underside helps the converter understand which part of the geometry needs attention.
If the candidate only stands after an operator manually shapes it, record that action. Decide whether the regular packing and retail process can reasonably include it. If support depends on a tray, assess the pack and tray as a system. The correct outcome may be conditional acceptance for a supported display rather than a claim that the unsupported pouch has passed.
Choose the next geometry adjustment deliberately
When neither candidate fits, change one dimension or design assumption at a time. Increasing base depth can alter the shelf footprint and carton arrangement. Increasing height can affect shelf clearance and panel proportions. A change intended to improve display should therefore return to the same filled comparison, using a clearly identified drawing revision.
Keep an annotated photograph beside the dimension table. Mark the actual contact surface, the maximum filled width and any protruding closure. Give the next sample one question to resolve, such as improving unsupported standing or reducing interference between adjacent units. This produces a testable geometry decision while keeping film construction, barrier and production release as separate approvals.
Stand-up versus flat-bottom: a practical specification example
A brand is choosing a dry-food pack before commissioning artwork. Compare the same product in two filled samples, using the same net weight and display space. The useful difference may be the usable opening, footprint or closing method rather than the empty pouch silhouette. A window or valve is another specification within a format, so it should not silently replace the original comparison.
For this decision, start with the available shelf depth and number of visible panels. The useful output is front, side and base measurements of both filled samples. Put that output beside the relevant quotation, drawing or sample rather than leaving it in a separate email. This is an illustrative decision exercise, not a report of a completed customer trial.
Product references to make the discussion concrete
The catalogue includes flat-bottom pouches and window pouches. These examples show different physical constructions; they are not interchangeable specifications. A box-style base gives the filled pack a distinct footprint, with separate front, back and side panels. Compare a plain top opening with a regular zipper, and use filled samples to decide the shelf depth and panel proportions.
| Format reference | Material or construction to clarify | Details to include in the brief |
|---|---|---|
| Flat-bottom pouches | Flexible laminate with paper-look or opaque outer options; the appearance alone does not identify the full layer structure. | Base width and full opened depth; net fill and product bulk. |
| Window pouches | A transparent window combined with paper-look or opaque flexible panels; confirm the full structure and product requirements. | Window width, height and location; product visibility at full and low fill. |
Use the reference pictures to identify the base, side panels, window or opening that you mean. A picture cannot supply the missing dimensions or material layers. If a photograph shows a finish or closure you do not want, state that difference explicitly; otherwise a visual reference can introduce an unintended requirement.
Complete the record before requesting the next sample
- Attach front, side and base measurements of both filled samples. Identify the product or SKU and the date of the observation.
- Record the available shelf depth and number of visible panels. Keep confirmed information separate from proposed values and questions for the supplier.
- Add the actual fill weight or volume, the dimension convention, material proposal and intended closure. Include the number of designs and quantity per design when requesting a quotation.
- State which question the next drawing, sample or quotation must resolve. A change of size, closure or material should remain visible alongside the earlier reference.
This record makes the next conversation specific. It lets the design, purchasing and packing teams work from the same proposed item and shows which decision still needs evidence. Review the related product pages for format details, or prepare a custom packaging brief with the unresolved requirements.
Select the demonstrated geometry
Choose the candidate that satisfies the agreed shelf, opening and pack-out requirements with an acceptable commercial proposal. Retain its filled reference and drawing as the geometry baseline. Record whether the decision applies to one fill size or a family of sizes, and request another review when the product bulk or weight changes. A format decision becomes useful when it tells the next team exactly which shape was approved and under what conditions.
Send the completed filled-footprint comparison card with your product and filling details to Navkar Poly Print for a project-specific discussion. Ask for the proposed specification, evidence required and open questions to be recorded before quotation approval.
Sources and scope.
These references support the technical discussion. Product photographs illustrate formats; the material, dimensions and suitability of the proposed pack are confirmed for each project.
- Mondi stand-up pouch
Primary format reference; does not establish the performance of another supplier's pack.
- Mespack solution finder
Equipment supplier distinguishes rollstock and premade-pouch routes; no Navkar equipment inference.
Let’s discuss your product.
Share your contents, dimensions, filling method, quantity and delivery destination. We’ll work through the proposed packaging specification with you.
Create a packaging brief