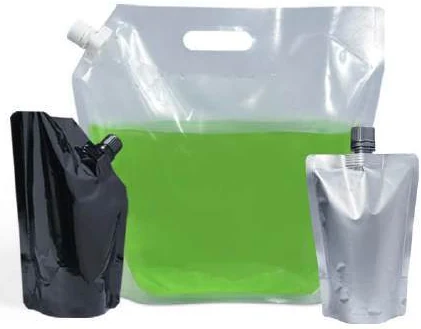
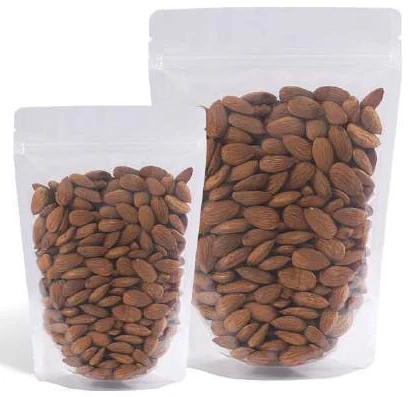
Choose between centre-seal and three-side-seal pouches by mapping the seams, product entry and final closure. The names describe different ways of forming a package, but suppliers may use naming conventions differently. An annotated drawing settles the practical question: which parts arrive sealed and what must the packing team finish? Use that drawing to compare printable panels and filling access without assuming that one format suits every powder, snack or liquid.
Read the seam arrangement
A centre-seal design typically has a longitudinal seam on the rear and end closures; a three-side-seal design is identified by its edge-seal arrangement. Request the actual drawing because folds and supplier terminology can change how a pack is described. Mark the inside and outside, the front face and every existing seal. Ask the converter to show the filling opening on the same view. This avoids the common misunderstanding in which the brand approves one face arrangement while the packing team expects to fill from a different edge.
Match the product entry to the filling operation
Check how the intended dose enters the available opening and where the pack is gripped. Product flow, particle size and the filling method matter more than an industry stereotype about the format. Ask the line owner to review the drawing and sample. For roll-fed production, distinguish the supplied reel from a finished empty pouch; the packing equipment may create several seals during the cycle. For premade supply, identify the closure still required after filling. Do not infer equipment compatibility from the appearance of a filled retail reference.
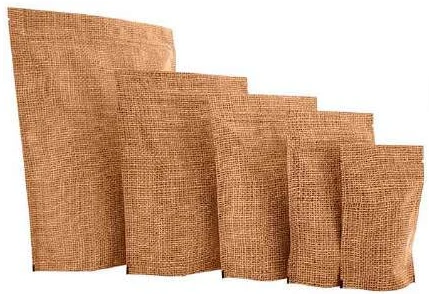
Compare artwork after reserving functional areas
A rear seam can divide the back layout, while edge seals reduce usable panel space around the perimeter. Ask for a controlled artwork layout based on the approved structural drawing. Keep the information hierarchy readable when the pack is filled and curved. If a tear feature, coding area or hanging feature is proposed, add it to the seal map instead of treating it as a later decoration. Review front, rear and side views together so changing a seam location does not accidentally move important text into a fold or final closure area.
Prepare a seal-location record
Make one record for each candidate. Use numbered seal paths on the drawing so procurement, artwork and the filling team can refer to the same location without ambiguous phrases such as top side.
| Record | What to capture and how to use it |
|---|---|
| Existing seal paths | Number the seals already completed when the packaging arrives. Include the drawing revision and inside/outside orientation; use the numbering in inspection records so a defect location can be communicated without photographs alone. |
| Product entry edge | Mark the opening through which the intended product enters and show any gripping zone. Ask the line owner to confirm access using a representative sample before the pack dimensions are treated as final. |
| Final closure path | Identify the seal completed by the filling operation and name its approval owner. Record the proposed trial evidence and acceptance reference without prescribing generic machine settings or assuming an empty sample proves closure performance. |
| Artwork exclusion areas | Show the agreed seals, folds and functional features on the artwork layout. Ask the converter for the relevant clearances instead of borrowing distances from an unrelated pack or measuring a distorted retail reference. |
| Sample comparison | Record each sample's source, size, structure and open edge. Explain any difference from the proposed production pack so a useful geometry reference is not mistaken for a fully representative approval specimen. |
Return the annotated drawing to all three parties for agreement. A supplier name and a pouch name are insufficient substitutes for a shared record of how the pack is formed, filled and closed.
Illustrative misunderstanding caught before artwork release
A buyer requests a three-side-seal sample with an opening on the edge the designer calls the top. The filling team expects the branded panel to face a different direction in its fixture. Instead of rotating the final artwork informally, the buyer issues a seal map showing the product-entry arrow, front-panel label and final closure number. The converter and line owner confirm the revised view. The example shows why the orientation should be approved structurally before text, tear features and coding positions become fixed.
Mespack identifies distinct supply routes. Syntegon is a primary reference for forming and sealing equipment.
Draw both contact surfaces at every closure
A seal map becomes useful when it shows which surfaces meet. Trace the product-contact side through the proposed construction and mark the closing interface. A centre-seal pack commonly has a longitudinal closure plus end closures; a three-side-seal pouch has a different preformed perimeter and an agreed remaining filling opening. The exact drawing controls the job, particularly where suppliers use different names.
Do not use the count in a format name as a complete list of finished-pack risks. Mark corners, changes in material thickness, folded areas and the fill opening. These are locations to discuss with the converter and filler. The purpose is to understand the continuous closure path, including how the final operation joins the seals that already exist.
Locate filling and inspection access
Sketch the pouch as it reaches the filling station, before final closure. Show how the product enters and where the operator or machine holds the pack. A convenient front panel is of limited help if the chosen opening is difficult to present consistently. Ask the filler to mark the space required for its dose path and final closing operation on this same sketch.
For inspection, agree which parts of the perimeter can be seen readily and which require turning the pack. A rear longitudinal seal may sit beneath the displayed face, while a perimeter arrangement may expose other edges. Neither arrangement automatically proves better integrity. The practical question is whether the agreed checks can cover the intended closure path under the actual operating conditions.
Read format drawings rather than importing dimensions
Glenroy's fin-seal layout separates front and back artwork, web width, repeat and registration information. It is a useful example of drawing the manufactured web and the visible pack together. Its dimensions and production requirements belong to that supplier's layout; they are not tolerances for a Navkar project.
Ask for the equivalent project drawing and locate the longitudinal seam relative to the artwork. Check where important text falls after wrapping and closing. For a three-side-seal option, identify the usable panels and the edge reserved for filling. Compare the two using finished visible areas, rather than assuming that equal outside width provides equal uninterrupted artwork space.
Work through a product accumulation scenario
Consider an illustrative granular product that sometimes settles near the final closure before sealing. First record the dose path, timing and actual location of the particles. Then inspect whether the opening and holding arrangement allow the intended closure area to remain clear. Changing from one seal layout to another may alter access, but the observation does not by itself prove that the format caused the contamination.
Make the next trial question specific: can the agreed filling sequence consistently leave the identified closing region clear? Keep product quantity and the observation method comparable between candidates. If a sequence change resolves the issue, retain that condition with the sample record. If the geometry needs changing, return to the drawing before commissioning new artwork or converting tools.
Keep appearance and closure evidence distinct
A seam placed away from the main graphic can help panel planning, but its location still needs functional review. Conversely, a visibly neat perimeter does not establish seal strength or absence of leaks. Record visual appearance, drawing conformance and any agreed integrity evidence as separate results. This prevents a signed artwork proof from becoming an accidental closure approval.
Use the map to assign the remaining operation explicitly. The converter should identify which closures are supplied; the filler should identify the closure it completes. When the sample passes the agreed checks, retain a marked image showing the path that was evaluated. Later requests to move a seam, widen an edge or alter the fill opening can then be reviewed against a clear baseline.
Seal-layout comparison: a practical specification example
A brand is choosing a dry-food pack before commissioning artwork. Compare the same product in two filled samples, using the same net weight and display space. The useful difference may be the usable opening, footprint or closing method rather than the empty pouch silhouette. A window or valve is another specification within a format, so it should not silently replace the original comparison.
For this decision, start with the front-panel seam and usable mouth width. The useful output is a drawing marking the open edge and each finished seal. Put that output beside the relevant quotation, drawing or sample rather than leaving it in a separate email. This is an illustrative decision exercise, not a report of a completed customer trial.
Product references to make the discussion concrete
The catalogue includes flat-bottom pouches and window pouches. These examples show different physical constructions; they are not interchangeable specifications. A box-style base gives the filled pack a distinct footprint, with separate front, back and side panels. Compare a plain top opening with a regular zipper, and use filled samples to decide the shelf depth and panel proportions.
| Format reference | Material or construction to clarify | Details to include in the brief |
|---|---|---|
| Flat-bottom pouches | Flexible laminate with paper-look or opaque outer options; the appearance alone does not identify the full layer structure. | Base width and full opened depth; net fill and product bulk. |
| Window pouches | A transparent window combined with paper-look or opaque flexible panels; confirm the full structure and product requirements. | Window width, height and location; product visibility at full and low fill. |
Use the reference pictures to identify the base, side panels, window or opening that you mean. A picture cannot supply the missing dimensions or material layers. If a photograph shows a finish or closure you do not want, state that difference explicitly; otherwise a visual reference can introduce an unintended requirement.
Complete the record before requesting the next sample
- Attach a drawing marking the open edge and each finished seal. Identify the product or SKU and the date of the observation.
- Record the front-panel seam and usable mouth width. Keep confirmed information separate from proposed values and questions for the supplier.
- Add the actual fill weight or volume, the dimension convention, material proposal and intended closure. Include the number of designs and quantity per design when requesting a quotation.
- State which question the next drawing, sample or quotation must resolve. A change of size, closure or material should remain visible alongside the earlier reference.
This record makes the next conversation specific. It lets the design, purchasing and packing teams work from the same proposed item and shows which decision still needs evidence. Review the related product pages for format details, or prepare a custom packaging brief with the unresolved requirements.
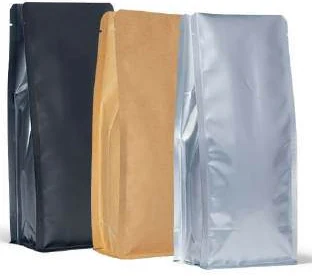
Release an agreed seam drawing
Compare quotations against the same seal map, material requirements and supply form. Ask each supplier to identify deviations in writing. Keep any proposed product application subject to the appropriate technical review; seam geometry does not establish shelf life, barrier or formulation compatibility. When a repeat order changes the open edge or seam position, revise the drawing and repeat the affected filling and artwork checks rather than relying on the familiar format name.
Send the completed seal-location record with your product and filling details to Navkar Poly Print for a project-specific discussion. Ask for the proposed specification, evidence required and open questions to be recorded before quotation approval.
Sources and scope.
These references support the technical discussion. Product photographs illustrate formats; the material, dimensions and suitability of the proposed pack are confirmed for each project.
- Mespack solution finder
Equipment supplier distinguishes rollstock and premade-pouch routes; no Navkar equipment inference.
- Syntegon SVX vertical packaging
Primary equipment reference for vertical forming, filling and sealing; machine-specific claims are not transferred.
- Fin-Seal Layout
Manufacturer web-layout example showing panels, repeat, web width and registration fields; supplier-specific geometry only.
Let’s discuss your product.
Share your contents, dimensions, filling method, quantity and delivery destination. We’ll work through the proposed packaging specification with you.
Create a packaging brief