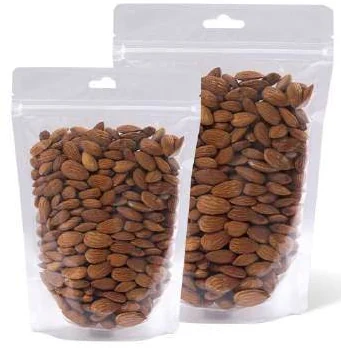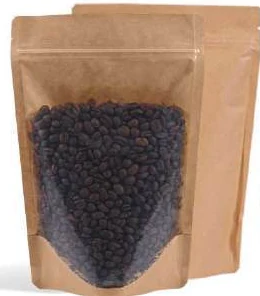
Choose gift pouch dimensions from an arrangement map of the actual assortment. Include inner packs, inserts and cards, then review fit and presentation after the intended handling sequence. A total weight alone cannot describe how a mixed set occupies space.
List every component
Record the dimensions or representative envelope of each item and whether it is individually packed. Include supporting cards, dividers and inserts if proposed. Identify direct-contact questions separately so an attractive outer gift pouch is not mistaken for an assessed primary pack.
Give each assortment version its own code. A festival set, a corporate set and a replenishment bundle can share branding while requiring different internal arrangements. The buying team should be able to identify exactly which set a sample represents.
Draw the proposed arrangement
Mark item order, orientation and any restraint or support used. Observe whether contents move into a less presentable arrangement during ordinary intended handling. If an insert is proposed, include it in cost, identity and approval rather than treating it as an informal packing aid.
SEE's three-side-seal sheet and Craftz's four-side-seal gusset example are different construction references. Select a candidate through the assortment task and converter review, not the format name alone.
Approve the gift as received
Review the appearance after opening the transport carton and completing the intended handover. Record the outer pouch condition and contents arrangement separately. Do not claim damage prevention or carrying performance without an appropriate evaluation accepted by the responsible team.
Build a component register before drawing the pouch
Give every item in the gift set an identifier and record its supplied condition. Include individual wrappers, small cartons, protective sleeves, tags, cards and inserts. State whether their dimensions are confirmed or preliminary. A list containing only product names leaves the designer unable to distinguish a loose item from its final inner pack. Ask the assortment owner to provide representative components so the arrangement reflects what the packing team will actually receive.
Record alternatives explicitly. If a seasonal item might be replaced, give the proposed replacement its own row and note which arrangement questions remain open. Do not treat similar weight as equivalent occupied space. A taller inner carton or a projecting closure can change how the set fits even when the combined mass remains close. The component register gives procurement a way to ask for a specific review when the assortment changes late in development.
Map both the final layout and the packing order
Draw the final arrangement from the view used during presentation. Mark front-facing items, orientation, any overlapping parts and the card location. Add a second sketch showing the insertion sequence. An attractive layout inside a transparent mock-up may be difficult to reproduce through the proposed opening. Ask the packing team to assess access using its authorised method. If an item must move temporarily during assembly, make that movement part of the review rather than hiding it in the finished photograph.
Keep proposed restraints and inserts visible in the bill of materials. State who supplies them, who assembles them and whether they are included in the quotation. An informal piece of card used to stabilise the prototype can become an unrecorded requirement. If the final presentation depends on it, assign it a reference and review its suitability for the intended contents. If it is only a temporary modelling aid, state that clearly and do not use the photograph as a production packing instruction.
Compare common and dedicated outer packs
Standardising the outer pouch can simplify the item list, but assess each assortment separately. A shared pack may need different inserts or packing maps, which bring their own component and assembly requirements. A dedicated outer pack may improve the intended fit while creating another stock item. Compare those consequences using the planned assortment quantities and actual quotations. A reduction in outer-pack variants alone is not evidence of lower total cost.
For an illustrative comparison, Set A contains two inner cartons and a card; Set B contains those components plus a wrapped item. Give each set a layout and candidate code. Review the common outer pouch with A and B independently. If A needs a support insert, include its identity and assembly task in the common-pack option. Compare the dedicated alternative on the same basis, including all components. Leave financial cells blank until the buyer has an identified quotation or its own documented cost assumption.
Examine the gift at successive points
Define the review points: immediately after assembly, after placement in the transport carton, at receipt and during the intended handover. Ask the responsible team to select an appropriate handling evaluation. Record the arrangement at each point with labelled photographs. This can reveal which part of the journey needs investigation. It does not establish a damage-prevention claim or a carrying rating, and the procedure should not be borrowed from an unrelated gift set.
Separate outer appearance from internal arrangement. The outer pouch may look acceptable while the card has moved behind an inner carton. Conversely, the contents may remain arranged while the visible presentation differs from the agreed view. Record those findings independently and assign the right owner. The designer, converter, assortment owner and packing team may control different parts of the solution. A single overall appearance score would conceal that distinction.
Use a packing map that somebody else can follow
Prepare a one-page map with component images, codes, insertion order and the accepted finished view. State which side faces the shopper and where the card belongs. Identify the governing assortment revision and outer-pouch construction. Ask a person who did not make the original prototype to follow the map under the authorised packing procedure. Questions about orientation or missing accessories are useful document findings, not evidence that the operator should simply copy the photograph more carefully.
When the map changes, check whether component quantities and the commercial scope also change. An added insert may require another purchase item and another assembly action. A changed card may alter the occupied space or presentation. Keep these decisions connected to the assortment revision so the purchasing team can order the correct set of materials. The map should make the accepted arrangement repeatable while leaving technical application decisions with their appropriate owners.
Define how substitutions are handled
Give the assortment owner a route for approving a component replacement before it enters packing. Compare the replacement's envelope, orientation, surface contacts and mass with the accepted component. Ask which earlier observations remain applicable and document the reason. If the arrangement changes, issue a revised map and review the affected fit and presentation. A replacement should not inherit approval merely because the outer branding is unchanged.
Use the record to distinguish an approved alternative from an unresolved shortage response. The packing team needs clear instructions about whether it may use either listed component or must await a decision. Retain the accepted map, sample identity and relevant evidence together. This gives a future seasonal assortment a useful starting point while preserving the task-specific boundaries of the earlier gift review.
Illustrative assortment matrix
Imagine Set A holds two inner packs and a card, while Set B adds a third inner pack. Use separate rows for item references, arrangement, filled mass and outer-pouch candidate. A common outer pouch may simplify buying, but it may also leave one set poorly presented. Compare identified prototypes for each arrangement before choosing. If a shared pack is retained, define the approved insert or arrangement for both sets. This turns standardisation into a documented decision rather than requiring the packing team to improvise with the available space during dispatch.
A working record for this decision
Use this original worksheet with your product and supplier team. Give each row a named owner and evidence reference; a blank answer remains an open decision.
| Record | What to enter and why |
|---|---|
| Assortment identity | List set code, individual item references, inner packs, card and insert revisions. |
| Arrangement map | Show order, orientation and any proposed support or restraint within the outer pouch. |
| Filled envelope | Record representative overall space and mass without relying on summed product weights alone. |
| Presentation criteria | Define visible arrangement, opening experience and acceptable appearance with the brand reviewer. |
| Shared-pack decision | Record which sets share a pouch and the approved arrangement for each. |
Hanging hole: a practical specification example
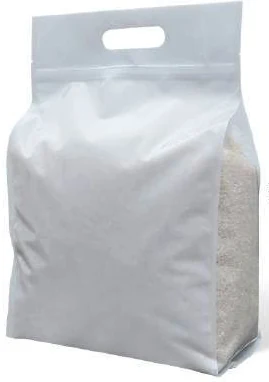
A special retail profile must still provide a usable cavity and a practical opening. A hanging header, die-cut outline or carrying feature occupies material that cannot automatically be counted as product space. Start with a drawing of the actual product envelope, then place the feature and the artwork. Compare the filled pack on the intended fixture rather than judging only the flat silhouette.
For this decision, start with the hook size and header allowance. The useful output is the hole position coordinated with zipper and top seal. Put that output beside the relevant quotation, drawing or sample rather than leaving it in a separate email. This is an illustrative decision exercise, not a report of a completed customer trial.
Product references to make the discussion concrete
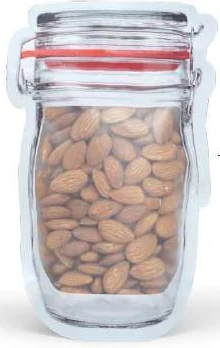
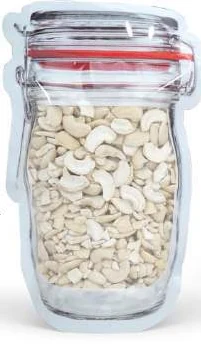
The catalogue includes jar-shaped zipper pouches and hanging display pouches. These examples show different physical constructions; they are not interchangeable specifications. A contoured outline gives the pouch a jar-like silhouette while retaining a flexible pack construction. The narrow shoulder and top opening affect filling and access. Review the usable cavity, zipper length and artwork boundaries on a dimensioned drawing before committing to the shape.
| Format reference | Material or construction to clarify | Details to include in the brief |
|---|---|---|
| Jar-shaped zipper pouches | Clear or frosted flexible pouch construction with a zipper; the jar shape is a profile, not a rigid container. | Usable cavity and narrowest opening; die-cut outline and corner radii. |
| Hanging display pouches | Clear or opaque flexible pouch construction with a punched hanging feature; final material and reinforcement are reviewed for the fill. | Retail hook and hole dimensions; filled weight and hanging orientation. |
Use the reference pictures to identify the base, side panels, window or opening that you mean. A picture cannot supply the missing dimensions or material layers. If a photograph shows a finish or closure you do not want, state that difference explicitly; otherwise a visual reference can introduce an unintended requirement.
Complete the record before requesting the next sample
- Attach the hole position coordinated with zipper and top seal. Identify the product or SKU and the date of the observation.
- Record the hook size and header allowance. Keep confirmed information separate from proposed values and questions for the supplier.
- Add the actual fill weight or volume, the dimension convention, material proposal and intended closure. Include the number of designs and quantity per design when requesting a quotation.
- State which question the next drawing, sample or quotation must resolve. A change of size, closure or material should remain visible alongside the earlier reference.
This record makes the next conversation specific. It lets the design, purchasing and packing teams work from the same proposed item and shows which decision still needs evidence. Review the related product pages for format details, or prepare a custom packaging brief with the unresolved requirements.
Put the decision into practice
1. Build the set list. Include all items and presentation components before requesting an outer pouch size.
2. Map each arrangement. Create a separate layout for materially different gift sets and identify any common candidate pack.
3. Review representative gifts. Observe fit and presentation using the actual intended assortment and agreed handling sequence.
4. Release packing instructions. Keep the accepted arrangement and component references available to the packing team.
Share the assortment maps and component references with Navkar Poly Print before asking for a common gift pouch size.
Sources and scope.
These references support the technical discussion. Product photographs illustrate formats; the material, dimensions and suitability of the proposed pack are confirmed for each project.
- SEE: Three Side Seal Pouches
Manufacturer format reference for a three-side sealed pouch; supplied features and suitability are not transferred to Navkar.
- Craftz: four-side seal pouches with gusset
Manufacturer format example demonstrates why drawings are needed to distinguish seal and gusset constructions.
Let’s discuss your product.
Share your contents, dimensions, filling method, quantity and delivery destination. We’ll work through the proposed packaging specification with you.
Create a packaging brief