Map every seal path on the proposed pouch and identify who creates each joint. Include intersections and feature interfaces, not only the most visible perimeter seals. This gives the converter and filling team a common location reference for approval and investigation. The drawing should describe the actual proposed geometry; it should not prescribe a universal seal width or imply that appearance alone proves package integrity.
Draw the complete joint network
Use front, rear and relevant base or side views to identify the seals. Show folds, gussets and fitments where they meet those paths. A flat rectangle may conceal an intersection that matters in the formed geometry, so ask the converter to confirm the view. Number locations consistently and use the same names in inspection records. Avoid relying on top or left without an orientation reference. A seal-path map is useful when another person can identify the exact location without needing to interpret an unlabelled photograph.
Assign the creation and acceptance owners
Mark the seals completed during pouch supply and the closure completed after product entry. A feature such as a zipper does not eliminate the need to identify the original final closure. Ask the converter and filling site to agree the interface between their operations. Record who reviews each location and what evidence is required. ASTM F1886/F1886M addresses visual seal inspection, while ASTM F88/F88M addresses seal strength. Qualified reviewers must choose applicable methods and acceptance criteria for the actual design.
Use the map during changes and complaints
If a gusset, spout or pouch dimension changes, compare the affected joint network with the accepted drawing. Ask whether the relevant evidence remains applicable. During investigation, identify the observed issue by seal number and specimen reference before deciding its cause. Keep different locations separate: a concern at the final filling closure may need different evidence from one at a supplier-completed feature joint. The map should support investigation and approval, not automatically assign blame to whichever party made the nearest joint.
Build a seal-path responsibility map
Use the map as a location index for the technical record. Add the actual design and evidence references, leaving methods and operating decisions with the qualified teams.
| Record | What to capture and how to use it |
|---|---|
| Drawing and orientation | Record the pouch drawing revision with front, rear and opening directions. Include relevant formed views so the same seal location can be identified by the converter, filling team and incoming inspector. |
| Seal network | Number each path, intersection and feature joint that needs review. Show folds or gussets at the interface rather than treating the pouch as a uniform flat perimeter with no local geometry differences. |
| Creation owner | Identify the operation that makes each joint and the party responsible for that operation. Mark the closure completed after filling explicitly, preserving the handover between empty-pouch supply and the filled-pack process. |
| Evidence reference | Link location-specific samples and the qualified review basis to the map. Distinguish visual, strength and other integrity questions rather than assuming one observation or report answers every requirement. |
| Change or issue | Record affected seal numbers, observed symptoms and the responsible review action. Reassess applicable evidence after geometry or feature changes, and preserve neutral findings until an investigation supports a cause. |
Keep a clean approved map and a separate annotated copy for discussions. This prevents a proposed seal change or investigative arrow from becoming an unintended manufacturing instruction.
Illustrative feature intersection
A team adds a proposed fitment to a pouch concept. The seal-path map reveals that the feature introduces a new joint and changes the nearby geometry. The buyer asks the converter and filling owner what evidence is required for the revised interface. It does not assume that the earlier plain-pouch approval transfers unchanged. The example identifies an evidence question and responsibility boundary without claiming that the new feature is defective or prescribing how the joint should be produced.
Trace the closure as a continuous path
Start at one point on the drawing and follow every intended joint around the finished package. Mark where the path turns, intersects another closure or crosses a folded region. Show the fill opening in the delivered state and the operation that completes it. This gives the review a physical object instead of a list of seal names.
Use separate colours or labels for supplied closures and the filler-completed closure. The map should remain readable in a printed copy, so do not rely on colour alone. Add a legend and viewing direction. A photograph can support the drawing, but folds and the product can hide parts of a path that still require identification.
Mark changes in layer arrangement
A folded corner or intersection can present a different layer arrangement from a simple flat joint. Ask the converter to identify the relevant regions on the actual construction. The buying team need not prescribe a seal-bar design; it needs to ensure that the technical assessment recognises the geometry that will be manufactured and closed.
Ilhan, ten Klooster and Gibson's 2023 study examined BOPP/metBOPET/CPP film using seal tests and cross-section imaging. It found different sealing responses at corners and layer transitions. The material and laboratory conditions limit transfer: the findings justify attention to geometry, not copying the paper's settings into another pouch process.
Assign evidence to a location
When a report or sample is used, identify the part of the path it represents. A strip from a straight region does not automatically characterise an intersection. A visual image of the top closure does not show every supplied perimeter joint. Ask the technical owner which evidence is needed for the relevant regions and intended decision.
Record the specimen's drawing, construction and process reference as appropriate. If the sample differs from the proposed order, state the difference. The map can then show accepted coverage and unresolved questions without implying that one favourable result covers the entire network of closures.
Include the product and filling state
The seal map should show where the contents are intended to be when the final operation occurs. Ask the filler to identify clearance and holding requirements through its actual procedure. Product can reach a different region during dosing than after it settles. A neat finished sample alone cannot reconstruct that sequence.
For an illustrative gusseted pouch, mark the body, folded regions and final closing area before filling. Observe the relevant region using representative product and the agreed route. If product enters the closing area, record the event location and conditions. The next action is a defined interface review, rather than assuming the seal drawing or material alone caused the observation.
Keep appearance, strength and leakage separate
A closure may appear neat while another required assessment remains open. A strength result measures a particular response of the tested specimen, while a leak assessment asks a different question. Identify the methods selected by the technical owner and the acceptance basis for the actual application. This article does not prescribe a universal test combination.
The map should point to the evidence rather than duplicate technical procedures. Procurement can confirm that each important region and requirement has an owner and an accepted reference. It should not infer a safety or shelf-life conclusion from a visual signoff or a format's familiar appearance.
Use the map to review a changed feature
If a zipper, spout, notch or dimension changes, locate it against the current closure path. Ask whether the change affects a joint, intersection, filling clearance or evidence specimen. Retain unaffected conclusions with the technical owner's rationale and reassess the relevant changed region.
The final map is a compact index to the finished package's joints and their evidence. Keep it with the controlled drawing and accepted sample references. A new colleague should be able to identify every intended closure, who creates it and where its assessment is recorded. That shared picture makes later enquiries and investigations more precise without inventing universal sealing settings or company test results.
Seal design: a practical specification example
A pouch closes neatly when empty but behaves differently once product reaches the seal area. Use a representative fill and distinguish the factory-made seals, the final closing seal and any reclosure. The useful record shows where the problem appeared and what product or handling condition was present. Do not change several variables at once and then attribute the result to one feature.
For this decision, start with the seal location and available clear area. The useful output is a drawing distinguishing factory seals from the final closing seal. Put that output beside the relevant quotation, drawing or sample rather than leaving it in a separate email. This is an illustrative decision exercise, not a report of a completed customer trial.
Product references to make the discussion concrete
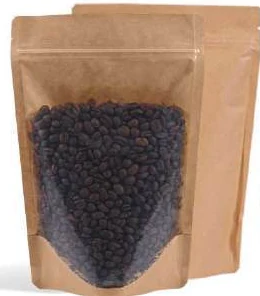
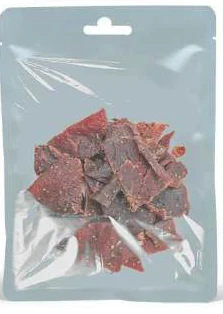
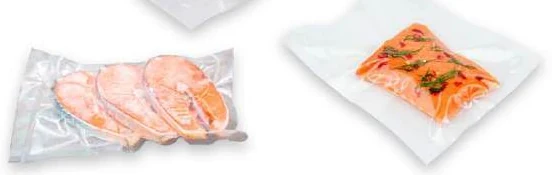
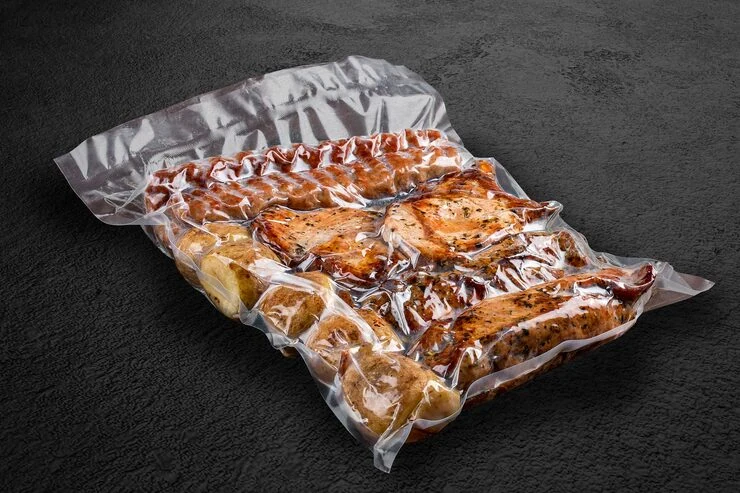
The catalogue includes dried-food and pet-treat pouches and vacuum packaging bags. These examples show different physical constructions; they are not interchangeable specifications. A clear face can show the contents, while an opaque panel leaves space for the artwork. Discuss zipper and no-zipper versions according to portion size and use after opening. The food or treat formulation, surface oils and intended storage conditions determine the material brief.
| Format reference | Material or construction to clarify | Details to include in the brief |
|---|---|---|
| Dried-food and pet-treat pouches | Clear-front or opaque flexible laminate with a product-specific contact layer; barrier and seal requirements are confirmed separately. | Product texture, oils and portion size; use after first opening. |
| Vacuum packaging bags | Clear or opaque flexible vacuum-bag construction; layer structure, thickness and surface requirements are confirmed for the packing method. | Product shape, edges and fill weight; usable opening and final seal band. |
Use the reference pictures to identify the base, side panels, window or opening that you mean. A picture cannot supply the missing dimensions or material layers. If a photograph shows a finish or closure you do not want, state that difference explicitly; otherwise a visual reference can introduce an unintended requirement.
Complete the record before requesting the next sample
- Attach a drawing distinguishing factory seals from the final closing seal. Identify the product or SKU and the date of the observation.
- Record the seal location and available clear area. Keep confirmed information separate from proposed values and questions for the supplier.
- Add the actual fill weight or volume, the dimension convention, material proposal and intended closure. Include the number of designs and quantity per design when requesting a quotation.
- State which question the next drawing, sample or quotation must resolve. A change of size, closure or material should remain visible alongside the earlier reference.
This record makes the next conversation specific. It lets the design, purchasing and packing teams work from the same proposed item and shows which decision still needs evidence. Review the related product pages for format details, or prepare a custom packaging brief with the unresolved requirements.
Approve a location-specific handover
Keep the accepted map with the structural and material references. Use its location numbers in sample reviews and issue records. When requesting a quotation, ask the supplier to identify any different proposed seal arrangement. This makes the final closure and local interfaces concrete before commercial approval and gives future investigations a shared vocabulary.
Send the completed seal-path responsibility map with your product and filling details to Navkar Poly Print for a project-specific discussion. Ask for the proposed specification, evidence required and open questions to be recorded before quotation approval.
Sources and scope.
These references support the technical discussion. Product photographs illustrate formats; the material, dimensions and suitability of the proposed pack are confirmed for each project.
- ASTM F1886/F1886M visual inspection of flexible seals
Method scope for visual seal inspection; method selection and acceptance criteria require qualified review.
- ASTM F88/F88M seal strength
Standards-owner method scope; qualified team must determine current applicable edition and acceptance criteria.
- Observing the effect of pressure and temperature on the seal integrity of critical seal regions of various flexible bag designs
Ilhan, ten Klooster and Gibson (2023), BOPP/metBOPET/CPP laboratory and production-sample study; geometry-dependent findings only, no transferred settings.
Let’s discuss your product.
Share your contents, dimensions, filling method, quantity and delivery destination. We’ll work through the proposed packaging specification with you.
Create a packaging brief