Choose corner-spout position by reviewing the intended dispensing task and the packing interface together. State what the user pours, into what receiving opening and how the pouch is held. A corner position that looks balanced on a front mock-up may create an awkward grip or interfere with the actual filling route.
Describe the pour in practical terms
Record the actual product form, intended quantity and ordinary use conditions supplied by the product owner. State whether the user transfers the whole contents or dispenses repeatedly. Identify the receiving container or opening. Do not infer flow behaviour from a broad label such as sauce, oil or refill.
Ask the responsible technical team to review product compatibility and process suitability separately. The position trial can identify a handling preference, but it cannot demonstrate that the proposed material or closure is suitable for an untested formulation, filling condition or storage process.
Make a position decision before planning a dose study
This review chooses a credible physical arrangement for the intended receiving task. State the actual receiver, how the pouch approaches it and the expected product-removal pattern. Detailed repeated-portion measurement belongs to a later, separately defined observation once the configuration is fixed.
Identify hard interface constraints first. The line may require a particular presentation region, while the receiver may limit the available approach. Ask their owners to supply actual information. A preferred front appearance is a design preference to be considered within those confirmed boundaries.
Create candidate drawings with clearly different position references. Avoid comparing only cap colour or a rotated photograph. The team needs to know which physical geometry changes and how that change relates to the receiving and filling interfaces.
For an illustrative refill project, a central and lateral candidate are considered against the same receiving opening. The review records visibility, approach and supporting contact. It selects a geometry to develop further, while leaving product-specific technical and any measured dispensing claims to their appropriate later evidence. No position is declared universally best.
Treat position as a defined construction choice
Gualapack's premade-pouch resource distinguishes central and lateral spout positions. For your proposal, request a drawing showing the actual corner position, angle and adjoining seal arrangement. Do not use a generic catalogue silhouette as the controlling reference.
Identify the matched closure components. Gualapack's caps-and-spouts page presents related component systems. Specify the proposed system through the supplier and ask what documentation and samples support it. An apparent diameter match alone is not a complete component approval.
Review handling as a sequence of connected actions
ISO 22015 places opening and closing within broader physical handling and manipulation. This standards context supports reviewing the whole task rather than a static cap view. The public abstract supplies no recommended posture or load for this pouch.
Map the transition from the pack's resting orientation to receiver approach, opening and product removal. Record where the user needs to see the receiving opening and where the body or their hand may obstruct that view. The exact product and approved use sequence remain part of the observation.
Keep cap access and supporting grip as separate rows. A candidate can provide a clear approach while making cap operation awkward. Another can offer comfortable access but place the outlet poorly for the receiver. The product owner should decide the trade-off using the intended task.
Record which operations are performed with the pack supported and which involve another defined contact. Follow the authorised procedure and have competent owners assess handling questions. The worksheet is not an instruction to improvise a movement or a substitute for the technical assessment required by the actual filled quantity.
Use a dispensing-path worksheet
| Task stage | What to observe | Required record |
|---|---|---|
| Hold | Supporting hand and grip area | Pack orientation |
| Open | Cap access and hand clearance | Complete closure identity |
| Aim | Spout relation to receiving opening | Receiving-container details |
| Dispense | Direction, control and product remaining | Defined product and use condition |
| Reclose | Access after dispensing | Reclosure observation |
This original worksheet does not prescribe a spout angle or flow rate. It describes evidence the design team needs to compare practical alternatives. Keep sample IDs and actual product conditions beside each observation.
Observe the whole use sequence
Use an authorised controlled trial with the intended product or an explicitly identified development substitute. Record any substitute's limitation; do not present it as proof for the final formulation. Let reviewers perform the task from an unopened sample where appropriate, using normal handling.
An illustrative comparison may find that one corner arrangement helps aim into a narrow receiving opening but makes cap access awkward for the supporting hand. Another may offer better cap access with a different pour orientation. Record both consequences so the buyer chooses for the actual task rather than a preferred front appearance.
Compare alternatives without changing every input
Use the same receiver and representative product condition for a position comparison where practical. If the component system or pouch body also differs, identify those differences. The result then concerns complete proposals, not proof that position alone caused an advantage.
Begin with qualitative task questions: can the intended approach be made, is the opening visible, can the cap be reached and does the complete sequence match the product proposition? Define any measurements through the responsible technical team when needed. Avoid attaching arbitrary scores or limits to give an uncertain choice false precision.
Retain the original observation for each candidate. If a reviewer changes grip, record when and why as far as the observation supports. Do not convert the event automatically into an ergonomic failure or a superior design. The significance depends on the actual use requirement and technical review.
For an illustrative decision, both positions are workable but one conflicts with an already confirmed filling interface. The team can retain the feasible candidate for further development while recording the rejected option's actual reason. This is more useful than concluding that the rejected position is unsuitable for every product or line.
Review the filling interface independently
The packing owner should identify how the pouch is presented, supported, filled and finally closed. A user-friendly corner does not prove compatibility with existing filling equipment. Obtain the relevant interface information and have the supplier review it before artwork is frozen.
Also inspect the filled pouch's standing orientation and carton arrangement. A projecting feature can change how packs nest or how the front faces. These are observations for the complete package; they should not be inferred solely from the empty drawing.
Carry the selected geometry into the next activity
After selection, issue one drawing showing the position, orientation and actual component references. Identify the product and receiver covered by the decision. A later small-dose observation, user review or technical assessment should reference that same configuration so the project does not assess different packs under one name.
Check the effect on artwork and outer packing. A feature can alter where instructions fit or how complete packs nest in a carton. Those consequences may be addressed through targeted reviews rather than reopening unrelated decisions. Keep their owners and evidence references in the file.
If a supplier proposes a component or position change, compare it with the selected baseline before accepting it. A visually similar outlet may have a different identity or local geometry. Ask which existing evidence remains relevant and what new observation is needed.
The useful output is a justified position choice with clear next dependencies. It allows development to progress without claiming that geometry selection proves product compatibility, closure performance or dispensing accuracy. Keeping that boundary explicit preserves this article's task: selecting where the spout belongs in the actual complete system.
Define left and right from the agreed front view. A mirrored photograph or a pack turned over can reverse an informal corner description. Use drawing coordinates and orientation arrows in the selected proposal, then compare the physical sample with that view before carrying the position into artwork or further trials.
Corner spout: a practical specification example
A pouch feature can help one handling action while changing another. A hanging hole needs a header; a spout changes the opening and artwork area; a zipper needs a clear path for reclosure. Define the action the feature supports before adding it to the drawing. Review the whole pack with the product present instead of approving the component in isolation.
For this decision, start with the spout angle, bore and dispensing direction. The useful output is a cap-and-spout layout coordinated with the artwork. Put that output beside the relevant quotation, drawing or sample rather than leaving it in a separate email. This is an illustrative decision exercise, not a report of a completed customer trial.
Product references to make the discussion concrete
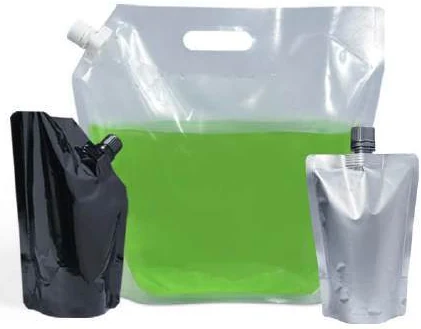
The catalogue includes spout pouches and hanging display pouches. These examples show different physical constructions; they are not interchangeable specifications. A fitted spout provides a controlled opening for dispensing. The reference range includes compact pouches and larger handled formats. Specify the product, fill volume, spout location and cap before developing the pouch shape; a corner spout and a top-centre spout require different layouts.
| Format reference | Material or construction to clarify | Details to include in the brief |
|---|---|---|
| Spout pouches | Flexible liquid-pack laminate with a fitted spout and cap; contact-layer and closure compatibility are reviewed for the formulation. | Fill volume and product viscosity; spout bore, position and cap. |
| Hanging display pouches | Clear or opaque flexible pouch construction with a punched hanging feature; final material and reinforcement are reviewed for the fill. | Retail hook and hole dimensions; filled weight and hanging orientation. |
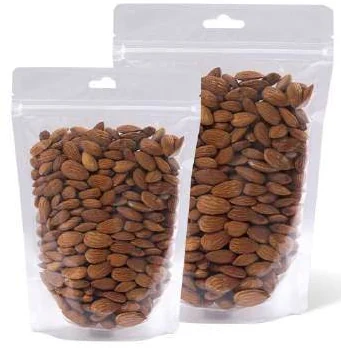
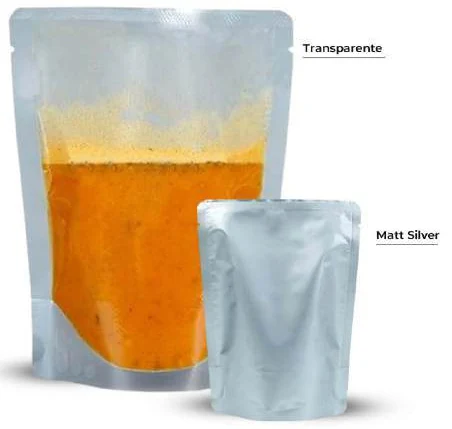
Use the reference pictures to identify the base, side panels, window or opening that you mean. A picture cannot supply the missing dimensions or material layers. If a photograph shows a finish or closure you do not want, state that difference explicitly; otherwise a visual reference can introduce an unintended requirement.
Complete the record before requesting the next sample
- Attach a cap-and-spout layout coordinated with the artwork. Identify the product or SKU and the date of the observation.
- Record the spout angle, bore and dispensing direction. Keep confirmed information separate from proposed values and questions for the supplier.
- Add the actual fill weight or volume, the dimension convention, material proposal and intended closure. Include the number of designs and quantity per design when requesting a quotation.
- State which question the next drawing, sample or quotation must resolve. A change of size, closure or material should remain visible alongside the earlier reference.
This record makes the next conversation specific. It lets the design, purchasing and packing teams work from the same proposed item and shows which decision still needs evidence. Review the related product pages for format details, or prepare a custom packaging brief with the unresolved requirements.
Release a position with bounded evidence
Keep the position drawing, component references, dispensing record and filling-interface review linked. State the product and use conditions covered by approval. If formulation, fitment or fill process changes, ask which reviews must be repeated.
Send Navkar Poly Print the dispensing-path worksheet, technical product brief and line-interface details. Request a corner-spout proposal that can be sampled and assessed across holding, opening, pouring and reclosing, with suitability evidence reviewed by the responsible technical owners.
Sources and scope.
These references support the technical discussion. Product photographs illustrate formats; the material, dimensions and suitability of the proposed pack are confirmed for each project.
- Gualapack: premade pouches
Shows central and lateral spout positioning as separate design choices; proprietary specifications not transferred.
- Gualapack: caps and spouts
Describes matched cap-and-spout systems and distinct closure designs.
- ISO 22015:2019: handling and manipulation
Public scope places opening and closing within physical handling and manipulation; no safe load, posture or universal user limit inferred.
Let’s discuss your product.
Share your contents, dimensions, filling method, quantity and delivery destination. We’ll work through the proposed packaging specification with you.
Create a packaging brief