
Specify the base gusset as a drawing feature and verify the opened base as a filled-pack behaviour. The empty folded measurement and the footprint of a filled pouch should not share one unqualified “depth” field. Keep both records, because they support different decisions.
Label the base before discussing size
Ask the converter to mark the base fold, adjoining seals and intended standing surface on a drawing. Name the front and back. A bottom view is often more useful than another front-view sketch because it shows the feature being discussed. Keep the drawing unambiguous when viewed without the physical sample.
Layfield's design guide illustrates the base gusset of a stand-up pouch. Use such format diagrams for vocabulary; request project-specific geometry from the supplier. A generic illustration does not establish your seal dimensions, capacity or manufacturing acceptance limits.
Record two different depth values
The first record describes the empty construction. It should say whether the number covers the whole gusset or one folded portion and identify the reference edges. The second record describes the finished pack resting on its intended base, with product quantity and settling condition stated.
Avoid calculating finished depth by simply treating the pouch as a rigid rectangular box. Flexible panels curve, product settles and seals occupy space. If the product consists of large irregular pieces, the same mass can form a different profile from one fill to another. Photograph that variation rather than recording only the best-looking pack.
Use a base-deployment observation sheet
This original observation sheet helps packing and design teams discuss the same sample. It is a practical review aid, not a test standard.
| Observation | Record | Decision it informs |
|---|---|---|
| Empty construction | Drawing revision and defined base dimension | Sample matches the proposal |
| Initial fill | Product amount and base opening behaviour | Filling sequence needs review |
| After settling | Standing depth and visible fold condition | Shelf footprint is representative |
| After handling | Lean, rocking or unexpected folding | Presentation needs further trials |
| Closure completed | Final shape and top-panel position | Whole pack is acceptable |
Use descriptive observations such as “right base corner remains tucked after normal fill.” “Bad base” is too vague to guide a change. Note whether the problem appears before closing, after closing or after the pouch is placed into its carton.
Review the base with the rest of the pack
A base change can affect panel appearance, fill access and outer packing. Compare samples with the same product and quantity while changing one defined feature at a time where feasible. Otherwise a better-looking result cannot be attributed confidently to the gusset adjustment.
GS1's measurement standard includes standing measurement treatment for relevant gusseted packs. Keep any customer listing measurement separate from the converter's empty-pouch drawing. One is a description of a supplied trade item; the other controls how an unfilled component is made.
Show the base from underneath
Add a bottom view to the front and side views. Mark the fold, adjoining seals and intended contact region. This helps the buyer distinguish the manufactured base geometry from the surface actually supporting the filled pack. Use the current drawing and sample identity so the underside photograph cannot be mistaken for another candidate.
The base fold should be described in its measurement state. If a number refers to a folded portion, label it accordingly. If another reference describes the opened construction, show that separately. Avoid merging these into a single depth field that later becomes both an order dimension and a shelf-space assumption.
Observe deployment before judging stance
Watch how the base opens during the intended filling sequence. Record whether a region remains tucked or requires an intervention. Then observe the closed pouch on the agreed surface. The two observations answer different questions: how the base reaches its filled geometry and how the completed pack rests in use.
Do not automatically classify a fold or wrinkle as a defect before the agreed criteria are defined. Describe the region and consequence. A tucked corner matters when it interferes with the required base deployment or display task. The technical team needs that physical description to evaluate construction, geometry and filling influences.
Compare the same product condition
Use the intended quantity and representative product. State whether observations occur immediately after filling or after an agreed settling action. A carefully arranged sample and an untouched sample are not equivalent conditions. If a manual action is necessary for routine use, record it and ask the operations owner whether it belongs in the accepted process.
For an illustrative comparison, two samples may share the same empty base dimension while one is filled with large pieces and the other with a fine product. Their different stance cannot be assigned solely to the fold. The comparison changed the contents as well. Keep the result descriptive and obtain the relevant product-specific observation before selecting a geometry.
Separate support footprint from maximum depth
Identify the surface used during observation. A level shelf, a soft support and a hand-held specimen can produce different contact conditions, so the recorded stance should state which arrangement was assessed.
The actual region touching the shelf can differ from the widest filled depth above it. Record both where they answer the brief. The contact region helps describe stance, while the maximum occupied envelope helps check clearance and neighbouring packs. A single photograph from the front may show neither adequately.
Use a side and underside record with the measurement condition. Avoid squeezing the body to create a convenient rectangular footprint. The package is flexible, and the observed shape should represent the intended task. Ask the reviewer to identify whether the sample is unsupported or deliberately held by a tray or adjacent units.
Test the low-fill version as its own condition
If one pouch component is proposed for several quantities, examine the intended low-fill condition as well as the fuller one. Less product can produce a different body shape or base contact. This is a reason to observe the range, not a universal claim that low-fill pouches will fail. Keep the quantity labelled on each specimen.
Record which conditions the geometry decision covers. A favourable observation at one quantity cannot silently approve every commercial size. If another quantity is introduced later, use the earlier drawing and evidence as the baseline, then assess the changed filled condition and any affected retail or carton task.
Make the next revision answer a base question
If the sample rocks, leans or deploys incompletely, mark the relevant region and stage. Ask for a proposal addressing that observation. Increasing the gusset is one possible design change to assess, not an automatic remedy. It can alter the filled envelope and panel relationships as well as the base.
Where feasible, keep other relevant conditions comparable while reviewing a changed fold. If several variables change, record a comparison of complete candidates rather than claiming the gusset alone caused the improvement. Retain both drawings and photographs so the technical team can see exactly which relationships differ.
Preserve separate manufacturing and merchandising references
The accepted empty drawing controls the component. The filled base record describes the observed deployment and stance for its stated condition. The retailer's nominal dimension record follows its applicable convention. These references can be linked without being treated as interchangeable evidence.
The final decision should explain why the base arrangement fits the actual product and display task, with any support condition named. Keep the current drawing and retained samples accessible for repeat orders. A base gusset is then a defined structural feature with observed behaviour, rather than a capacity shortcut or an unsupported promise that any pouch with a bottom fold will stand identically.
Side versus bottom gusset: a practical specification example
A 250 g target is written on a brief before the product volume is known. Weighing the contents alone does not establish a pouch size: loose bulk, settling, shape and headspace all affect the usable cavity. A tall narrow pack and a wider shallow pack can have different handling and display characteristics. Compare filled samples before translating one reference into a new format.
For this decision, start with the location of the expanding panel. The useful output is a labelled drawing stating the measurement convention. Put that output beside the relevant quotation, drawing or sample rather than leaving it in a separate email. This is an illustrative decision exercise, not a report of a completed customer trial.
Product references to make the discussion concrete
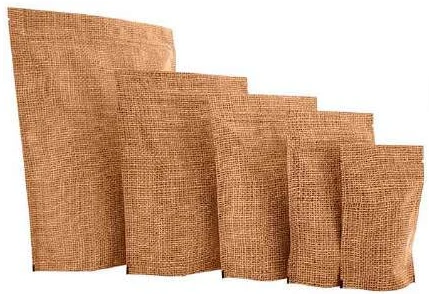
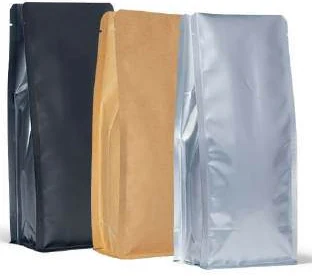
The catalogue includes flat-bottom pouches and side-gusset pouches. These examples show different physical constructions; they are not interchangeable specifications. A box-style base gives the filled pack a distinct footprint, with separate front, back and side panels. Compare a plain top opening with a regular zipper, and use filled samples to decide the shelf depth and panel proportions.
| Format reference | Material or construction to clarify | Details to include in the brief |
|---|---|---|
| Flat-bottom pouches | Flexible laminate with paper-look or opaque outer options; the appearance alone does not identify the full layer structure. | Base width and full opened depth; net fill and product bulk. |
| Side-gusset pouches | Paper-look and opaque or foil-look laminates are illustrated; confirm the actual inner and outer layers for the contents. | Face width and side-gusset convention; filled height and headspace. |
Use the reference pictures to identify the base, side panels, window or opening that you mean. A picture cannot supply the missing dimensions or material layers. If a photograph shows a finish or closure you do not want, state that difference explicitly; otherwise a visual reference can introduce an unintended requirement.
Complete the record before requesting the next sample
- Attach a labelled drawing stating the measurement convention. Identify the product or SKU and the date of the observation.
- Record the location of the expanding panel. Keep confirmed information separate from proposed values and questions for the supplier.
- Add the actual fill weight or volume, the dimension convention, material proposal and intended closure. Include the number of designs and quantity per design when requesting a quotation.
- State which question the next drawing, sample or quotation must resolve. A change of size, closure or material should remain visible alongside the earlier reference.
This record makes the next conversation specific. It lets the design, purchasing and packing teams work from the same proposed item and shows which decision still needs evidence. Review the related product pages for format details, or prepare a custom packaging brief with the unresolved requirements.
Freeze the fold only after a complete trial
Retain the filled-pack photographs, the empty sample and the drawing together. State the specific fill condition covered by approval. If the pack will be sold at more than one weight, test the intended range rather than extrapolating from the fullest sample. A low-fill version can present a different stance even when the pouch component is identical.
If a base appears unstable, ask the supplier and filling team to review the complete construction and process. Do not specify an arbitrary larger fold as the only remedy. Send Navkar Poly Print the labelled base drawing, product description, target quantities and deployment observations to obtain a proposal that can be sampled and checked in the actual use case.
Sources and scope.
These references support the technical discussion. Product photographs illustrate formats; the material, dimensions and suitability of the proposed pack are confirmed for each project.
- Layfield: packaging design guide
Illustrates stand-up pouch base-gusset architecture; not evidence for any food application here.
- GS1 Package and Product Measurement Standard
Distinguishes measurement treatment for different filled flexible-pack types; does not set converter tolerances.
Let’s discuss your product.
Share your contents, dimensions, filling method, quantity and delivery destination. We’ll work through the proposed packaging specification with you.
Create a packaging brief