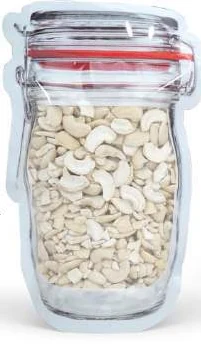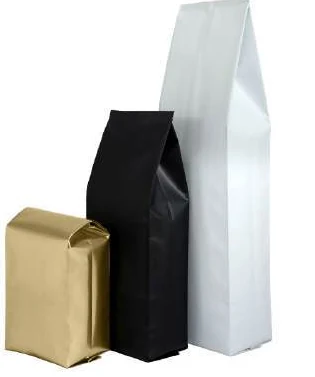
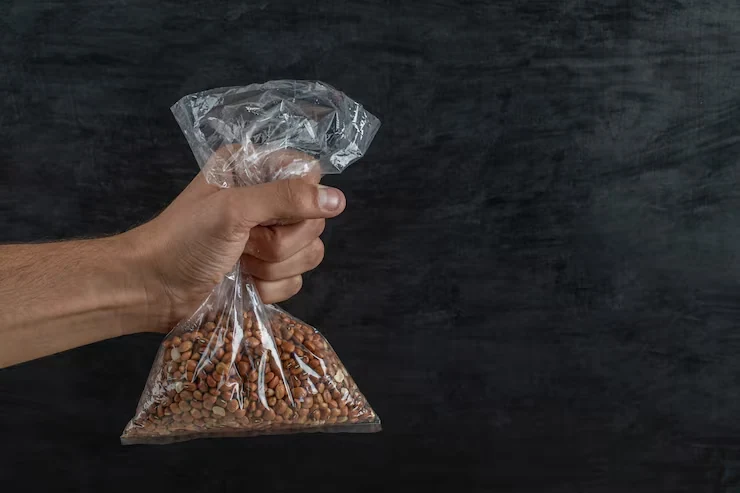
A side-gusset dimension is useful only when buyer and supplier mean the same fold. State whether a quoted number describes one folded leg or the opened depth, show the measurement on a sketch and obtain written confirmation. Never resolve an ambiguous gusset by silently multiplying or dividing the figure.
Start with the physical fold
Lay the empty sample on a clear surface and identify front, back, top and bottom. Mark the back seam if present. Open a side fold gently so the drawing can show which surfaces form the expansion. Do not stretch the film or flatten a formed feature into a shape it does not naturally take.
International Plastics' side-gusset guide illustrates external dimensions using its own notation. That is a useful reminder to read the arrows, not just the order of letters. A supplier's W × G × L description may differ from the order used in your internal system.
Translate notation once, then lock it
Create a terminology box on the drawing: W means the specified flat face width, H means the specified overall height, and the gusset label identifies its exact measurement. If the drawing uses SG1 and SG2, define each. If it uses a single opened-depth number, show the full opened distance with an arrow.
An illustrative enquiry reading “120 × 240 × 30” is incomplete. The buyer might mean a 30 mm folded leg while the supplier reads 30 mm total opened depth. Replace the shorthand with a labelled drawing and a sentence describing the fold. This example identifies an ambiguity; it does not prescribe a suitable pouch size.

Make a notation translation card
Use this original card when comparing quotations. Keep the supplier's wording beside your controlled internal definition, rather than overwriting one with the other.
| Record | Buyer definition | Supplier confirmation |
|---|---|---|
| Width | Reference edges and measurement state | Same edges or marked difference |
| Height | Inclusion of top and bottom seals | Same extent or marked difference |
| Gusset | Folded leg or total opened depth | Written interpretation |
| Units | Millimetres or expressly stated alternative | Confirmed units |
| Sample | Sample ID and drawing revision | Matching sample reference |
Add a photograph with the ruler aligned to the defined edges. An oblique photograph can make the apparent reading misleading, so use it to document the method as well as the result. Keep the physical sample when the fold is difficult to explain digitally.
Separate nominal size from acceptance limits
Agree the target dimension, measurement method and acceptance tolerance independently. Do not adopt another supplier's published tolerance as a universal standard. Ask which dimensions affect your filler opening, downstream carton or artwork placement, then agree how those dimensions will be checked.
Quantum Packaging lists height, width and side gusset as separate measurements. Use that separation to avoid a common procurement shortcut: treating a familiar product weight as sufficient description of a bag. The product trial still needs to establish usable capacity and closure clearance.
Identify the fold in more than one view
Use a front view to locate the face width and a side or sectional view to show the fold. Mark the top, bottom and relevant seam so the views can be related. A single arrow beside a flat rectangle may not reveal which part of the folded construction the number describes. The second view removes the need to interpret it from habit.
Keep the sample's natural state clear. If the fold is opened for explanation, label the image as opened. If it is measured flat, state the flat condition. Do not compare an opened dimension in one supplier's drawing with a folded dimension in another without explicitly translating the relationship.
Use a hypothetical translation to expose the ambiguity
Suppose a clearly labelled illustrative construction has two folded legs, each 20 mm, and its drawing defines the full opened contribution as 40 mm. The relationship is 20 plus 20 equals 40 under that drawing convention. It does not mean every supplier's 20 mm gusset notation should be doubled. The convention must first be established from the actual arrows and physical fold.
Write both the supplier notation and the buyer's controlled interpretation on the translation card. Ask for confirmation of the physical measurement, not only agreement with a formula. If the drawing uses an opened depth, retain that label. The objective is one shared meaning, with no silent arithmetic applied to a shorthand field.
Separate the fold from the filled envelope
An empty side fold describes manufactured geometry. The filled pouch can curve and expand around the product. Its observed depth depends on the complete construction and declared condition. Keep the filled envelope in another field rather than assuming that the opened fold number equals every depth measurement used for shelf or carton planning.
Measure representative filled samples under the relevant condition when that task arises. Record quantity, orientation and settling. A fold can be dimensionally correct while the product produces an unsuitable occupied shape. Conversely, an acceptable filled shape does not establish that the empty component meets its agreed drawing. Both records have a purpose.
Check both sides without presuming symmetry
When the drawing requires symmetrical folds, identify the two sides and compare each through the agreed method. If it permits another arrangement, retain that difference. A sample should not be made to look symmetrical by pulling or flattening it before the observation. Record the actual condition and ask the technical owner how to assess an unexpected difference.
Use photographs that show the relevant reference edges and the measurement tool in a readable position. A photograph is supporting context, not an excuse to estimate a dimension from perspective. Keep the actual reading and method in the table. If the sample is damaged or distorted, identify the limitation before using it as a manufacturing reference.
Follow the fold into panel planning
A side-gusset definition also helps the artwork team understand which region folds inward and which expands during filling. Link the accepted drawing to the panel map. Do not let the designer treat the additional fold area as uninterrupted front-panel space. Review the formed layout for any critical information placed near its boundaries.
If the fold changes, mark the affected panel relationship and ask which artwork checks need repeating. A small dimensional change can move a line break, image or information block relative to the formed face. Keep the size approval and artwork approval distinct while ensuring they refer to the same geometry.
Resolve an old-order mismatch once
An old purchase order may use a familiar three-number description without a drawing. Compare it with the retained physical sample and ask the current supplier to issue an explicit interpretation. Record what is known and what cannot be reconstructed. Do not present an estimated historical fold as a verified production specification.
Once the current geometry is accepted, update the controlled order description and retain the translation note. The next buyer should not have to solve the same ambiguity again. If a supplier changes, compare the new notation against the physical definition rather than copying the old sequence of numbers into a different template.
Keep acceptance practical
Agree which dimensions matter to filling, artwork and downstream fit, with the appropriate measurement method and acceptance basis. A blanket tolerance on every number can create unnecessary disputes while missing a critical reference. Ask the converter how the actual features are produced and measured.
The final side-gusset specification should be readable without oral explanation: views, arrows, units, state, definition and revision. It can then support quotation comparison and repeat ordering. Capacity, filled shape and closure remain linked but separate decisions, each assessed with evidence suited to its own task.
Capacity by fill weight: a practical specification example
A 250 g target is written on a brief before the product volume is known. Weighing the contents alone does not establish a pouch size: loose bulk, settling, shape and headspace all affect the usable cavity. A tall narrow pack and a wider shallow pack can have different handling and display characteristics. Compare filled samples before translating one reference into a new format.
For this decision, start with the actual product bulk and target weight. The useful output is a filled-sample check instead of a universal grams-to-size conversion. Put that output beside the relevant quotation, drawing or sample rather than leaving it in a separate email. This is an illustrative decision exercise, not a report of a completed customer trial.
Product references to make the discussion concrete
The catalogue includes side-gusset pouches and flat-bottom pouches. These examples show different physical constructions; they are not interchangeable specifications. Folded sides expand as the pouch fills. This format has a different filled footprint from a bottom-gusset stand-up pouch, so specify the face width and opened side depth separately. A coffee-valve version can be discussed for the relevant product.
| Format reference | Material or construction to clarify | Details to include in the brief |
|---|---|---|
| Side-gusset pouches | Paper-look and opaque or foil-look laminates are illustrated; confirm the actual inner and outer layers for the contents. | Face width and side-gusset convention; filled height and headspace. |
| Flat-bottom pouches | Flexible laminate with paper-look or opaque outer options; the appearance alone does not identify the full layer structure. | Base width and full opened depth; net fill and product bulk. |
Use the reference pictures to identify the base, side panels, window or opening that you mean. A picture cannot supply the missing dimensions or material layers. If a photograph shows a finish or closure you do not want, state that difference explicitly; otherwise a visual reference can introduce an unintended requirement.
Complete the record before requesting the next sample
- Attach a filled-sample check instead of a universal grams-to-size conversion. Identify the product or SKU and the date of the observation.
- Record the actual product bulk and target weight. Keep confirmed information separate from proposed values and questions for the supplier.
- Add the actual fill weight or volume, the dimension convention, material proposal and intended closure. Include the number of designs and quantity per design when requesting a quotation.
- State which question the next drawing, sample or quotation must resolve. A change of size, closure or material should remain visible alongside the earlier reference.
This record makes the next conversation specific. It lets the design, purchasing and packing teams work from the same proposed item and shows which decision still needs evidence. Review the related product pages for format details, or prepare a custom packaging brief with the unresolved requirements.
Resolve discrepancies before commercial release
If a sample and quotation appear inconsistent, stop the interpretation from spreading. Send one marked image showing the disputed edges, identify the conflicting records and ask for a corrected drawing or quotation. Do not ask the packing team to compensate for a dimensional disagreement during routine production.
Once resolved, give the notation card a revision and attach it to the order. On repeat orders, compare the ordered drawing with the retained approved reference rather than an old email attachment. Include the fold definition, fill quantity, packing interface and destination in the enquiry to Navkar Poly Print so the quotation is based on the same physical construction you intend to approve.
Sources and scope.
These references support the technical discussion. Product photographs illustrate formats; the material, dimensions and suitability of the proposed pack are confirmed for each project.
- International Plastics: side-gusset bag measuring guide
Illustrated external dimensions and dimension-order notation.
- Quantum Packaging: measuring a side-fold pouch
Named total height, width and side-gusset measurement convention; not a universal capacity chart.
Let’s discuss your product.
Share your contents, dimensions, filling method, quantity and delivery destination. We’ll work through the proposed packaging specification with you.
Create a packaging brief