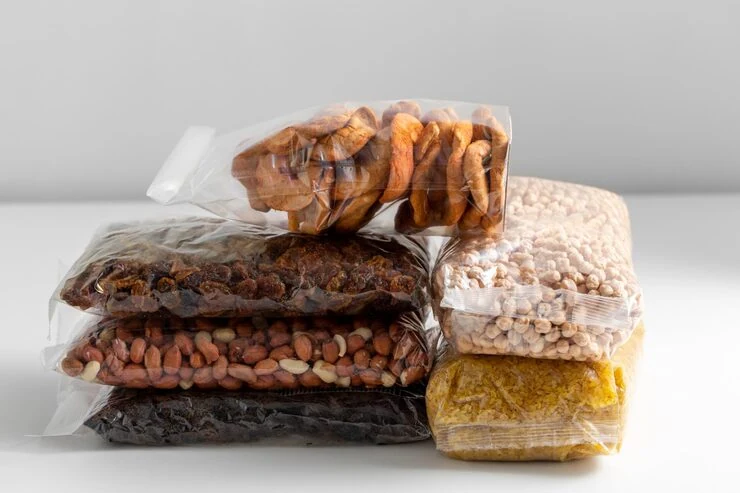

Approve shelf footprint using the filled, closed pouch in the intended display position. Empty width and gusset figures cannot show whether the front faces forward, the pack leans or the top interferes with a shelf above it. Use a real shelf sample or a simple physical gauge with the actual clearances.
Define the display task first
Ask how the pack will be presented: standing individually, within a tray, hanging or supported by neighbouring units. Record the usable opening, not merely the shelf's nominal overall size. Include shelf lip, price rail and any display tray that reduces the available space.
Decide what the customer needs to see from the normal approach. The brand, product identity and variant should not disappear because the base settles differently from the artwork mock-up. An attractive flat proof cannot reveal that problem. Bring brand and operations reviewers to the same physical sample rather than seeking separate approvals from unrelated images.
Observe a normal filled range
Fill samples with representative product and close them through the intended process. Allow the agreed settling condition before recording stance. If several fill weights use the same component, include the low and high intended quantities. Record a tilted or folded pack as an observation, not automatically as a material defect.
Layfield's design guide shows the supporting base fold of a stand-up construction. Actual stance still depends on the complete proposed pack. Ask the converter and packing team to review persistent lean or incomplete base opening instead of assuming that any pouch with a base fold will display identically.
Build a shelf-fit worksheet
| Check | Record | Review question |
|---|---|---|
| Height clearance | Filled topmost point and shelf opening | Can staff place and remove it easily? |
| Occupied depth | Actual resting footprint | Does it remain within the display area? |
| Front presentation | Photograph from customer approach | Are product and variant visible? |
| Adjacent packs | Planned number and arrangement | Do packs support or obscure each other? |
| After removal | Remaining display condition | Does the next pack remain usable and visible? |
This original worksheet includes removal because a full, carefully arranged row can conceal an unstable individual pack. Review the shelf after taking out a front unit. Use realistic staff handling rather than a photographer's ideal arrangement.
Separate measurement records by purpose
Keep the converter's empty-pouch drawing for component manufacture. Keep the shelf worksheet for merchandising. Keep retailer product data under the required data convention. GS1's standard provides rules for measuring different trade-item types; the customer's listing record may serve a different purpose from a shelf-space experiment.
Do not calculate a shelf promise from a nominal gusset dimension alone. Measure the actual occupied footprint. If the display uses a tray or outer case, approve the pack and support together. A pouch that requires support should not be shown internally as approved for unsupported standing.
Map the shelf's usable envelope
Measure the opening available after the price rail, lip, divider and support items are included. Record which surfaces define the usable height, width and depth. A retailer's overall shelf dimension may not equal the space available to one pack. Keep a photograph or sketch so the next reviewer can reconstruct the arrangement.
For a tray-supported display, identify the tray and its internal arrangement. For hanging or unsupported standing, record that different support condition explicitly. The same pouch can be proposed for several presentations, but each fit observation should name the one it actually examines. Avoid turning a supported result into an unsupported-standing claim.
Measure the filled envelope without posing it
Use representative filled and closed samples in the declared settling condition. Record deliberate shaping if it is part of preparation. Measure the maximum relevant occupied height and depth, including a protruding feature where it affects clearance. Do not press the pack into a convenient rectangle merely to reproduce an empty-drawing dimension.
Keep the observed contact region separate from maximum body depth when that distinction matters. The base may rest within the shelf while the body projects beyond it. A front photograph can make the pack appear to fit even when a side view reveals an interference. Retain both views with the sample identity visible.
Check placement and removal as actions
A static sample can fit the opening while being difficult to place or remove. Ask the retail or operations colleague to demonstrate the intended action. Record contact with the shelf above, neighbouring packs or the price rail. The task is to understand the physical interaction, not to create a numerical ease-of-use score without an appropriate study.
If the action requires tilting, identify whether that is a normal accepted part of stocking or a problem for the intended fixture. A different pack orientation can resolve one clash while hiding important information. Keep the handling and visibility observations together so the design decision does not improve one by silently sacrificing the other.
Observe the row after units leave
Arrange the intended display group, then remove units in a realistic sequence. Record how the remaining packs present when the front support disappears or only a few units remain. A full row can conceal a dependency on neighbouring packs. This does not necessarily reject the display; it identifies the support condition the retail team must understand.
Include the replenishment action. Staff may need to reach behind a row or insert packs into a tray from a particular direction. If the sample needs repeated reshaping, record that work. Ask whether a support adjustment, layout change or pouch geometry proposal best addresses the actual issue.
Use simple arithmetic to screen an arrangement
Suppose an illustrative usable shelf width is 480 mm and a filled candidate occupies 115 mm across in the proposed orientation. Four nominal positions use 460 mm, leaving an arithmetic difference of 20 mm. Five would need 575 mm. These invented dimensions screen a possible arrangement; the remaining difference is not a recommended clearance.
Verify the arrangement physically with representative samples and the actual obstructions. Natural shape, dividers and selection access can change what is practical. Do not claim that an extra facing will increase sales without suitable evidence. The fit record describes available positions and observed handling, not a commercial outcome.
Interpret lean through the complete system
Keep the display sample labels discreetly positioned but visible in the evidence photographs. If the brand team later selects another image for presentation, retain the technical observation set as well. A styled photograph can communicate design intent while no longer showing the exact fixture and preparation used for the fit decision.
If a pack leans, identify quantity, base deployment, support and the stage when it appears. Avoid diagnosing a material fault from stance alone. The converter and filling team may need to review geometry, product distribution or another condition. A larger base is one proposal to assess, rather than a universal remedy.
When comparing a revision, keep the fixture and relevant product condition consistent where practical. If several variables differ, state that the comparison concerns complete candidates. Retain the old observation so the team can see whether the revised design addresses the actual interference or visibility problem.
Keep shelf approval separate from other records
The converter drawing controls the empty component. The retailer data record follows the applicable nominal measurement convention. The shelf worksheet records a physical display task. Link them by item and revision without using one as a substitute for another. A correct data entry does not demonstrate an easy removal action.
The final shelf decision should state the accepted support, orientation, product quantity and fixture. Revisit it when those conditions change. This gives procurement and the brand a concrete basis for future sizes and channels, with a record of what was observed rather than a universal promise that a particular pouch format will always stand neatly or fit every shelf.
Shelf footprint: a practical specification example
A 250 g target is written on a brief before the product volume is known. Weighing the contents alone does not establish a pouch size: loose bulk, settling, shape and headspace all affect the usable cavity. A tall narrow pack and a wider shallow pack can have different handling and display characteristics. Compare filled samples before translating one reference into a new format.
For this decision, start with the available fixture depth and facing width. The useful output is the actual filled base dimensions in the intended orientation. Put that output beside the relevant quotation, drawing or sample rather than leaving it in a separate email. This is an illustrative decision exercise, not a report of a completed customer trial.
Product references to make the discussion concrete
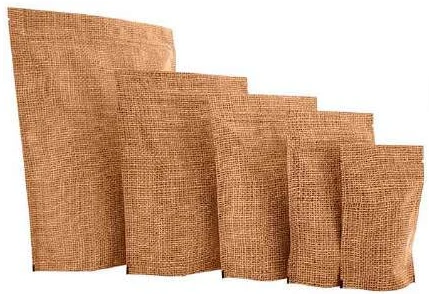
The catalogue includes flat-bottom pouches and side-gusset pouches. These examples show different physical constructions; they are not interchangeable specifications. A box-style base gives the filled pack a distinct footprint, with separate front, back and side panels. Compare a plain top opening with a regular zipper, and use filled samples to decide the shelf depth and panel proportions.
| Format reference | Material or construction to clarify | Details to include in the brief |
|---|---|---|
| Flat-bottom pouches | Flexible laminate with paper-look or opaque outer options; the appearance alone does not identify the full layer structure. | Base width and full opened depth; net fill and product bulk. |
| Side-gusset pouches | Paper-look and opaque or foil-look laminates are illustrated; confirm the actual inner and outer layers for the contents. | Face width and side-gusset convention; filled height and headspace. |
Use the reference pictures to identify the base, side panels, window or opening that you mean. A picture cannot supply the missing dimensions or material layers. If a photograph shows a finish or closure you do not want, state that difference explicitly; otherwise a visual reference can introduce an unintended requirement.
Complete the record before requesting the next sample
- Attach the actual filled base dimensions in the intended orientation. Identify the product or SKU and the date of the observation.
- Record the available fixture depth and facing width. Keep confirmed information separate from proposed values and questions for the supplier.
- Add the actual fill weight or volume, the dimension convention, material proposal and intended closure. Include the number of designs and quantity per design when requesting a quotation.
- State which question the next drawing, sample or quotation must resolve. A change of size, closure or material should remain visible alongside the earlier reference.
This record makes the next conversation specific. It lets the design, purchasing and packing teams work from the same proposed item and shows which decision still needs evidence. Review the related product pages for format details, or prepare a custom packaging brief with the unresolved requirements.

Turn observations into a practical change request
For each problem, state the condition and consequence: “low-fill sample leans forward and hides the variant below the price rail” gives the design team something to fix. Possible responses may involve layout, construction, fill quantity or display support; assess them through another controlled sample.
Retain the approved shelf photographs, sample identity and display dimensions. If a new retailer has a different opening, repeat the relevant fit check rather than assuming transfer. Send Navkar Poly Print the shelf worksheet, filled-pack reference and intended product range so the packaging discussion includes the real retail task.
Sources and scope.
These references support the technical discussion. Product photographs illustrate formats; the material, dimensions and suitability of the proposed pack are confirmed for each project.
- Layfield: packaging design guide
Illustrates stand-up pouch base-gusset architecture; not evidence for any food application here.
- GS1 Package and Product Measurement Standard
Distinguishes measurement treatment for different filled flexible-pack types; does not set converter tolerances.
Let’s discuss your product.
Share your contents, dimensions, filling method, quantity and delivery destination. We’ll work through the proposed packaging specification with you.
Create a packaging brief